This API is deprecated. Follow the Upload Files to Data
Engine tutorial instead.
Prerequisites
Before starting, ensure you have:- A Gloo AI Studio account
- Your Client ID and Client Secret from the API Credentials page
- Authentication setup - Complete the Authentication Tutorial first
The Realtime Ingestion API requires Bearer token authentication. If you
haven’t set up authentication yet, follow the Authentication
Tutorial to learn how to exchange your credentials
for access tokens and manage token expiration.
V1 Realtime Upload [Deprecated]
Key Features
- Real-time Processing: Content is processed upon upload
- Rich Metadata: Support for comprehensive content categorization
- Flexible Content Types: Articles, documents, media, and structured content
- Automatic Indexing: Content becomes searchable instantly
Step 1: Understanding the Realtime API
The Realtime Ingestion API allows you to upload content that gets processed and made available for search and AI interaction. The primary endpoint is: POST/ingestion/v1/real_time_upload
Key Features
- Real-time Processing: Content is processed upon upload
- Rich Metadata: Support for comprehensive content categorization
- Flexible Content Types: Articles, documents, media, and structured content
- Automatic Indexing: Content becomes searchable instantly upon file process completion.
Required Fields
{
  "content": "Your content text here",
  "publisherId": "Your publisher id here"
}
Optional Metadata Fields
- Content Details:
author,publication_date,item_title,item_subtitle,item_summary - Categorization:
type,pub_type,denomination,item_tags - Media:
item_image,item_url,hosted_url - Access Control:
drm,evergreen - Hierarchical Structure:
h2_title,h3_titlefor document sections
Step 2: Basic Content Upload
Let’s start with a simple content upload example. This demonstrates the core API call with proper authentication and error handling.API Request Structure
The
kallm DRM value shown in the examples below is deprecated and no longer
supported. Use aspen only.{
"content": "Your article content...",
"publisherId": "b6ada63e-f1ce-4a16-80da-9864f58c5bd7",
"item_title": "Developer Happiness",
"item_subtitle": "Beyond the Code",
"author": ["Aspiring Developer"],
"publication_date": "2025-08-26",
"type": "Article",
"pub_type": "technical",
"item_tags": ["documentation", "reference"],
"evergreen": true,
"drm": ["aspen", "kallm"]
}
Expected Response
{
  "success": true,
  "message": "Processing started, data will be uploaded shortly.",
  "task_id": null,
  "batch_id": null,
  "processing_details": null
}
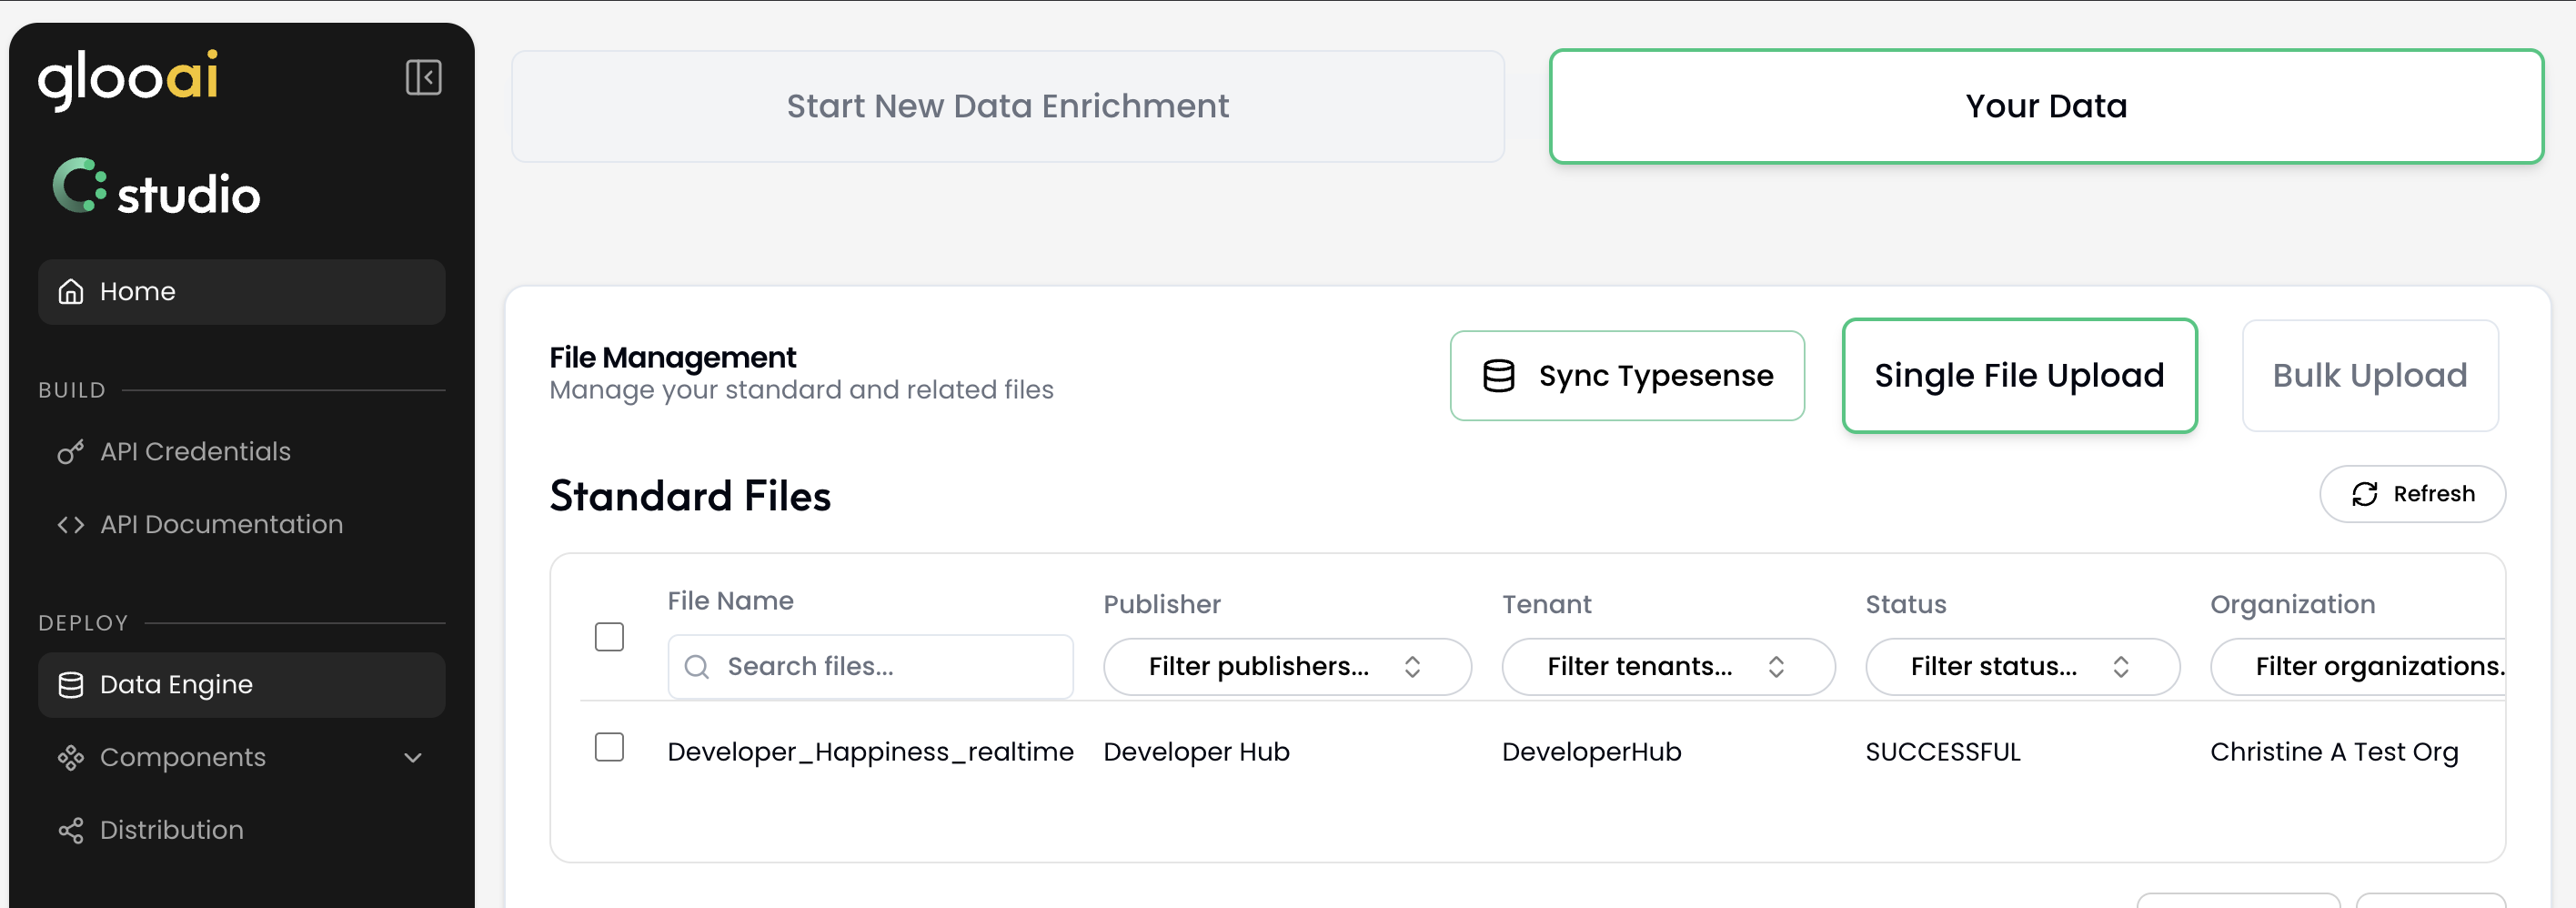
Step 3: Verifying Content Upload
After uploading content, you can check on progress through Gloo AI Studio.- Log in to Gloo AI Studio.
- Navigate to the Data Engine section from the main Studio sidebar.
- Click on Your Data.
Step 4: Setting Up File Monitoring
For automated content ingestion, you’ll want to monitor directories for new files and automatically process them. This creates a real-time content pipeline.File Watching Strategy
- Monitor Target Directory: Watch for new files or changes
- Extract Metadata: Parse filename and content for metadata
- Validate Content: Ensure required fields are present
- Upload with Retry: Handle failures gracefully
- Log Results: Track successful and failed uploads
Step 5: Batch Processing Pipeline
For processing multiple files or handling large volumes of content, batch processing provides better performance and resource management.Batch Processing Benefits
- Rate Limiting: Control API call frequency
- Progress Tracking: Monitor processing status
- Error Recovery: Retry failed uploads
- Resource Management: Efficient memory and network usage
Step 6: Production Considerations
Error Handling
- Authentication Failures: Token refresh and retry
- Rate Limiting: Exponential backoff
- Network Issues: Connection retry logic
- Validation Errors: Content preprocessing
Monitoring and Logging
- Success Metrics: Upload counts and timing
- Error Tracking: Failed uploads with reasons
- Performance Monitoring: API response times
- Health Checks: System status monitoring
Complete Examples
The following examples combine token management, file processing, and error handling into complete, production-ready solutions for each language. First, set up your environment variables in a.env file:
GLOO_CLIENT_ID=YOUR_CLIENT_ID
GLOO_CLIENT_SECRET=YOUR_CLIENT_SECRET
export GLOO_CLIENT_ID="your_actual_client_id_here"
export GLOO_CLIENT_SECRET="your_actual_client_secret_here"
import requests
import time
import json
import os
from datetime import datetime
from watchdog.observers import Observer
from watchdog.events import FileSystemEventHandler
from dotenv import load_dotenv

# Load environment variables from .env file
load_dotenv()

# --- Configuration ---
CLIENT_ID = os.getenv("GLOO_CLIENT_ID", "YOUR_CLIENT_ID")
CLIENT_SECRET = os.getenv("GLOO_CLIENT_SECRET", "YOUR_CLIENT_SECRET")
TOKEN_URL = "https://platform.ai.gloo.com/oauth2/token"
API_URL = "https://platform.ai.gloo.com/ingestion/v1/real_time_upload"
PUBLISHER_ID = "b6ada63e-f1ce-4a16-80da-9864f58c5bd7"  # Replace with your publisher ID

# --- State Management ---
access_token_info = {}

def get_access_token():
    """Retrieves a new access token."""
    headers = {"Content-Type": "application/x-www-form-urlencoded"}
    data = {"grant_type": "client_credentials", "scope": "api/access"}
    response = requests.post(TOKEN_URL, headers=headers, data=data, auth=(CLIENT_ID, CLIENT_SECRET))
    response.raise_for_status()
    token_data = response.json()
    token_data['expires_at'] = int(time.time()) + token_data['expires_in']
    return token_data

def is_token_expired(token_info):
    """Checks if the token is expired or close to expiring."""
    if not token_info or 'expires_at' not in token_info:
        return True
    return time.time() > (token_info['expires_at'] - 60)

def upload_content(content_data):
    """Uploads content to the Realtime API."""
    global access_token_info
    if is_token_expired(access_token_info):
        print("Token is expired or missing. Fetching a new one...")
        access_token_info = get_access_token()

    headers = {
        "Authorization": f"Bearer {access_token_info['access_token']}",
        "Content-Type": "application/json"
    }

    response = requests.post(API_URL, headers=headers, json=content_data)
    response.raise_for_status()
    return response.json()

def process_file(file_path):
    """Processes a single file and uploads its content."""
    try:
        with open(file_path, 'r', encoding='utf-8') as file:
            content = file.read()

        # Extract metadata from filename and content
        filename = os.path.basename(file_path)
        title = filename.replace('.txt', '').replace('.md', '').replace('_', ' ').title()

        content_data = {
            "content": content,
            "publisherId": PUBLISHER_ID,
            "item_title": title,
            "author": ["Automated Ingestion"],
            "publication_date": datetime.now().strftime("%Y-%m-%d"),
            "type": "Article",
            "pub_type": "technical",
            "item_tags": ["automated", "ingestion"],
            "evergreen": True,
            "drm": ["aspen", "kallm"]
        }

        result = upload_content(content_data)
        print(f"✅ Successfully uploaded: {title}")
        print(f"   Response: {result['message']}")
        return True

    except Exception as e:
        print(f"❌ Failed to process {file_path}: {e}")
        return False

class ContentHandler(FileSystemEventHandler):
    """Handles file system events for content monitoring."""

    def on_created(self, event):
        if not event.is_directory and event.src_path.endswith(('.txt', '.md')):
            print(f"📄 New file detected: {event.src_path}")
            time.sleep(1)  # Allow file write to complete
            process_file(event.src_path)

def start_file_watcher(watch_directory):
    """Starts monitoring a directory for new content files."""
    if not os.path.exists(watch_directory):
        os.makedirs(watch_directory)
        print(f"Created watch directory: {watch_directory}")

    event_handler = ContentHandler()
    observer = Observer()
    observer.schedule(event_handler, watch_directory, recursive=True)

    print(f"🔍 Monitoring directory: {watch_directory}")
    print("   Supported file types: .txt, .md")
    print("   Press Ctrl+C to stop")

    observer.start()
    try:
        while True:
            time.sleep(1)
    except KeyboardInterrupt:
        observer.stop()
        print("\n👋 Stopping file monitor...")
    observer.join()

def batch_process_directory(directory_path):
    """Processes all supported files in a directory."""
    if not os.path.exists(directory_path):
        print(f"Directory does not exist: {directory_path}")
        return

    processed = 0
    failed = 0

    for filename in os.listdir(directory_path):
        if filename.endswith(('.txt', '.md')):
            file_path = os.path.join(directory_path, filename)
            if process_file(file_path):
                processed += 1
            else:
                failed += 1

            # Rate limiting - avoid overwhelming the API
            time.sleep(1)

    print(f"\n📊 Batch processing complete:")
    print(f"   ✅ Processed: {processed} files")
    print(f"   ❌ Failed: {failed} files")

# --- Example Usage ---
if __name__ == "__main__":
    import sys

    if len(sys.argv) < 2:
        print("Usage:")
        print("  python main.py watch <directory>     # Monitor directory for new files")
        print("  python main.py batch <directory>     # Process all files in directory")
        print("  python main.py single <file_path>    # Process single file")
        sys.exit(1)

    command = sys.argv[1]

    if command == "watch" and len(sys.argv) > 2:
        start_file_watcher(sys.argv[2])
    elif command == "batch" and len(sys.argv) > 2:
        batch_process_directory(sys.argv[2])
    elif command == "single" and len(sys.argv) > 2:
        process_file(sys.argv[2])
    else:
        print("Invalid command or missing arguments")
const axios = require('axios');
const fs = require('fs');
const path = require('path');
const chokidar = require('chokidar');
require('dotenv').config();

// --- Configuration ---
const CLIENT_ID = process.env.GLOO_CLIENT_ID || 'YOUR_CLIENT_ID';
const CLIENT_SECRET = process.env.GLOO_CLIENT_SECRET || 'YOUR_CLIENT_SECRET';
const TOKEN_URL = 'https://platform.ai.gloo.com/oauth2/token';
const API_URL = 'https://platform.ai.gloo.com/ingestion/v1/real_time_upload';
const PUBLISHER_ID = 'b6ada63e-f1ce-4a16-80da-9864f58c5bd7'; // Replace with your publisher ID

// --- State Management ---
let tokenInfo = {};

async function getAccessToken() {
  const body = 'grant_type=client_credentials&scope=api/access';
  const response = await axios.post(TOKEN_URL, body, {
    headers: { 'Content-Type': 'application/x-www-form-urlencoded' },
    auth: { username: CLIENT_ID, password: CLIENT_SECRET },
  });
  const tokenData = response.data;
  tokenData.expires_at = Math.floor(Date.now() / 1000) + tokenData.expires_in;
  return tokenData;
}

function isTokenExpired(token) {
  if (!token || !token.expires_at) return true;
  return Date.now() / 1000 > token.expires_at - 60;
}

async function uploadContent(contentData) {
  if (isTokenExpired(tokenInfo)) {
    console.log('Token is expired or missing. Fetching a new one...');
    tokenInfo = await getAccessToken();
  }

  const response = await axios.post(API_URL, contentData, {
    headers: {
      Authorization: `Bearer ${tokenInfo.access_token}`,
      'Content-Type': 'application/json',
    },
  });
  return response.data;
}

async function processFile(filePath) {
  try {
    const content = fs.readFileSync(filePath, 'utf8');
    const filename = path.basename(filePath);
    const title = filename
      .replace(/\.(txt|md)$/, '')
      .replace(/_/g, ' ')
      .replace(/\b\w/g, (l) => l.toUpperCase());

    const contentData = {
      content: content,
      publisherId: PUBLISHER_ID,
      item_title: title,
      author: ['Automated Ingestion'],
      publication_date: new Date().toISOString().split('T')[0],
      type: 'Article',
      pub_type: 'technical',
      item_tags: ['automated', 'ingestion'],
      evergreen: true,
      drm: ['aspen', 'kallm'],
    };

    const result = await uploadContent(contentData);
    console.log(`✅ Successfully uploaded: ${title}`);
    console.log(`   Response: ${result.message}`);
    return true;
  } catch (error) {
    console.error(
      `❌ Failed to process ${filePath}:`,
      error.response ? error.response.data : error.message,
    );
    return false;
  }
}

function startFileWatcher(watchDirectory) {
  if (!fs.existsSync(watchDirectory)) {
    fs.mkdirSync(watchDirectory, { recursive: true });
    console.log(`Created watch directory: ${watchDirectory}`);
  }

  console.log(`🔍 Monitoring directory: ${watchDirectory}`);
  console.log('   Supported file types: .txt, .md');
  console.log('   Press Ctrl+C to stop');

  const watcher = chokidar.watch(watchDirectory, {
    ignored: /^\./,
    persistent: true,
  });

  watcher.on('add', async (filePath) => {
    if (path.extname(filePath).match(/\.(txt|md)$/)) {
      console.log(`📄 New file detected: ${filePath}`);
      // Small delay to ensure file write is complete
      setTimeout(() => processFile(filePath), 1000);
    }
  });

  process.on('SIGINT', () => {
    console.log('\n👋 Stopping file monitor...');
    watcher.close();
    process.exit(0);
  });
}

async function batchProcessDirectory(directoryPath) {
  if (!fs.existsSync(directoryPath)) {
    console.log(`Directory does not exist: ${directoryPath}`);
    return;
  }

  const files = fs.readdirSync(directoryPath);
  const supportedFiles = files.filter((file) => file.match(/\.(txt|md)$/));

  let processed = 0;
  let failed = 0;

  for (const filename of supportedFiles) {
    const filePath = path.join(directoryPath, filename);
    if (await processFile(filePath)) {
      processed++;
    } else {
      failed++;
    }

    // Rate limiting - avoid overwhelming the API
    await new Promise((resolve) => setTimeout(resolve, 1000));
  }

  console.log('\n📊 Batch processing complete:');
  console.log(`   ✅ Processed: ${processed} files`);
  console.log(`   ❌ Failed: ${failed} files`);
}

// --- Main Execution ---
async function main() {
  const args = process.argv.slice(2);

  if (args.length < 1) {
    console.log('Usage:');
    console.log(
      '  node index.js watch <directory>     # Monitor directory for new files',
    );
    console.log(
      '  node index.js batch <directory>     # Process all files in directory',
    );
    console.log('  node index.js single <file_path>    # Process single file');
    process.exit(1);
  }

  const command = args[0];

  try {
    switch (command) {
      case 'watch':
        if (args[1]) startFileWatcher(args[1]);
        else console.log('Please specify a directory to watch');
        break;
      case 'batch':
        if (args[1]) await batchProcessDirectory(args[1]);
        else console.log('Please specify a directory to process');
        break;
      case 'single':
        if (args[1]) await processFile(args[1]);
        else console.log('Please specify a file to process');
        break;
      default:
        console.log('Invalid command. Use watch, batch, or single');
    }
  } catch (error) {
    console.error(
      'An error occurred:',
      error.response ? error.response.data : error.message,
    );
  }
}

main();
import axios from 'axios';
import * as fs from 'fs';
import * as path from 'path';
import chokidar from 'chokidar';
import * as dotenv from 'dotenv';

// Load environment variables from .env file
dotenv.config();

// Type definitions
interface TokenInfo {
  access_token: string;
  expires_in: number;
  expires_at: number;
  token_type: string;
}

interface ContentData {
  content: string;
  publisherId: string;
  item_title: string;
  item_subtitle?: string;
  author: string[];
  publication_date: string;
  type: string;
  pub_type: string;
  item_tags: string[];
  evergreen: boolean;
  drm: string[];
  item_summary?: string;
  item_image?: string;
  item_url?: string;
}

interface ApiResponse {
  success: boolean;
  message: string;
  task_id: string | null;
  batch_id: string | null;
  processing_details: any | null;
}

// --- Configuration ---
const CLIENT_ID = process.env.GLOO_CLIENT_ID || 'YOUR_CLIENT_ID';
const CLIENT_SECRET = process.env.GLOO_CLIENT_SECRET || 'YOUR_CLIENT_SECRET';
const TOKEN_URL = 'https://platform.ai.gloo.com/oauth2/token';
const API_URL = 'https://platform.ai.gloo.com/ingestion/v1/real_time_upload';
const PUBLISHER_ID = 'b6ada63e-f1ce-4a16-80da-9864f58c5bd7'; // Replace with your publisher ID

// --- State Management ---
let tokenInfo: TokenInfo | null = null;

async function getAccessToken(): Promise<TokenInfo> {
  const body = 'grant_type=client_credentials&scope=api/access';
  const response = await axios.post<TokenInfo>(TOKEN_URL, body, {
    headers: { 'Content-Type': 'application/x-www-form-urlencoded' },
    auth: { username: CLIENT_ID, password: CLIENT_SECRET },
  });
  const tokenData = response.data;
  (tokenData as any).expires_at =
    Math.floor(Date.now() / 1000) + tokenData.expires_in;
  return tokenData;
}

function isTokenExpired(token: TokenInfo | null): boolean {
  if (!token || !(token as any).expires_at) return true;
  return Date.now() / 1000 > (token as any).expires_at - 60;
}

async function uploadContent(contentData: ContentData): Promise<ApiResponse> {
  if (isTokenExpired(tokenInfo)) {
    console.log('Token is expired or missing. Fetching a new one...');
    tokenInfo = await getAccessToken();
  }

  const response = await axios.post<ApiResponse>(API_URL, contentData, {
    headers: {
      Authorization: `Bearer ${tokenInfo!.access_token}`,
      'Content-Type': 'application/json',
    },
  });
  return response.data;
}

async function processFile(filePath: string): Promise<boolean> {
  try {
    const content = fs.readFileSync(filePath, 'utf8');
    const filename = path.basename(filePath);
    const title = filename
      .replace(/\.(txt|md)$/, '')
      .replace(/_/g, ' ')
      .replace(/\b\w/g, (l) => l.toUpperCase());

    const contentData: ContentData = {
      content: content,
      publisherId: PUBLISHER_ID,
      item_title: title,
      author: ['Automated Ingestion'],
      publication_date: new Date().toISOString().split('T')[0],
      type: 'Article',
      pub_type: 'technical',
      item_tags: ['automated', 'ingestion'],
      evergreen: true,
      drm: ['aspen', 'kallm'],
    };

    const result = await uploadContent(contentData);
    console.log(`✅ Successfully uploaded: ${title}`);
    console.log(`   Response: ${result.message}`);
    return true;
  } catch (error: any) {
    console.error(
      `❌ Failed to process ${filePath}:`,
      error.response ? error.response.data : error.message,
    );
    return false;
  }
}

function startFileWatcher(watchDirectory: string): void {
  if (!fs.existsSync(watchDirectory)) {
    fs.mkdirSync(watchDirectory, { recursive: true });
    console.log(`Created watch directory: ${watchDirectory}`);
  }

  console.log(`🔍 Monitoring directory: ${watchDirectory}`);
  console.log('   Supported file types: .txt, .md');
  console.log('   Press Ctrl+C to stop');

  const watcher = chokidar.watch(watchDirectory, {
    ignored: /^\./,
    persistent: true,
  });

  watcher.on('add', async (filePath: string) => {
    if (path.extname(filePath).match(/\.(txt|md)$/)) {
      console.log(`📄 New file detected: ${filePath}`);
      // Small delay to ensure file write is complete
      setTimeout(() => processFile(filePath), 1000);
    }
  });

  process.on('SIGINT', () => {
    console.log('\n👋 Stopping file monitor...');
    watcher.close();
    process.exit(0);
  });
}

async function batchProcessDirectory(directoryPath: string): Promise<void> {
  if (!fs.existsSync(directoryPath)) {
    console.log(`Directory does not exist: ${directoryPath}`);
    return;
  }

  const files = fs.readdirSync(directoryPath);
  const supportedFiles = files.filter((file) => file.match(/\.(txt|md)$/));

  let processed = 0;
  let failed = 0;

  for (const filename of supportedFiles) {
    const filePath = path.join(directoryPath, filename);
    if (await processFile(filePath)) {
      processed++;
    } else {
      failed++;
    }

    // Rate limiting - avoid overwhelming the API
    await new Promise((resolve) => setTimeout(resolve, 1000));
  }

  console.log('\n📊 Batch processing complete:');
  console.log(`   ✅ Processed: ${processed} files`);
  console.log(`   ❌ Failed: ${failed} files`);
}

// --- Main Execution ---
async function main(): Promise<void> {
  const args = process.argv.slice(2);

  if (args.length < 1) {
    console.log('Usage:');
    console.log(
      '  npx ts-node index.ts watch <directory>     # Monitor directory for new files',
    );
    console.log(
      '  npx ts-node index.ts batch <directory>     # Process all files in directory',
    );
    console.log(
      '  npx ts-node index.ts single <file_path>    # Process single file',
    );
    process.exit(1);
  }

  const command = args[0];

  try {
    switch (command) {
      case 'watch':
        if (args[1]) startFileWatcher(args[1]);
        else console.log('Please specify a directory to watch');
        break;
      case 'batch':
        if (args[1]) await batchProcessDirectory(args[1]);
        else console.log('Please specify a directory to process');
        break;
      case 'single':
        if (args[1]) await processFile(args[1]);
        else console.log('Please specify a file to process');
        break;
      default:
        console.log('Invalid command. Use watch, batch, or single');
    }
  } catch (error: any) {
    console.error(
      'An error occurred:',
      error.response ? error.response.data : error.message,
    );
  }
}

main();
<?php
require_once 'vendor/autoload.php';

use GuzzleHttp\Client;
use GuzzleHttp\Exception\RequestException;

// Load environment variables from .env file
$dotenv = Dotenv\Dotenv::createImmutable(__DIR__);
$dotenv->load();

// --- Configuration ---
$CLIENT_ID = $_ENV['GLOO_CLIENT_ID'] ?? 'YOUR_CLIENT_ID';
$CLIENT_SECRET = $_ENV['GLOO_CLIENT_SECRET'] ?? 'YOUR_CLIENT_SECRET';
$TOKEN_URL = 'https://platform.ai.gloo.com/oauth2/token';
$API_URL = 'https://platform.ai.gloo.com/ingestion/v1/real_time_upload';
$PUBLISHER_ID = 'b6ada63e-f1ce-4a16-80da-9864f58c5bd7'; // Replace with your publisher ID

// Validate credentials
if ($CLIENT_ID === 'YOUR_CLIENT_ID' || $CLIENT_SECRET === 'YOUR_CLIENT_SECRET' ||
    empty($CLIENT_ID) || empty($CLIENT_SECRET)) {
    echo "Error: GLOO_CLIENT_ID and GLOO_CLIENT_SECRET must be set\n";
    echo "Create a .env file with your credentials:\n";
    echo "GLOO_CLIENT_ID=your_client_id_here\n";
    echo "GLOO_CLIENT_SECRET=your_client_secret_here\n";
    exit(1);
}

// --- State Management ---
$tokenInfo = [];
$httpClient = new Client();

function getAccessToken($clientId, $clientSecret, $tokenUrl, $httpClient) {
    try {
        $response = $httpClient->post($tokenUrl, [
            'form_params' => [
                'grant_type' => 'client_credentials',
                'scope' => 'api/access'
            ],
            'auth' => [$clientId, $clientSecret]
        ]);

        $tokenData = json_decode($response->getBody(), true);
        $tokenData['expires_at'] = time() + $tokenData['expires_in'];
        return $tokenData;

    } catch (RequestException $e) {
        throw new Exception("Failed to get access token: " . $e->getMessage());
    }
}

function isTokenExpired($token) {
    if (empty($token) || !isset($token['expires_at'])) return true;
    return time() > ($token['expires_at'] - 60);
}

function uploadContent($contentData, $apiUrl, &$tokenInfo, $clientId, $clientSecret, $tokenUrl, $httpClient) {
    if (isTokenExpired($tokenInfo)) {
        echo "Token is expired or missing. Fetching a new one...\n";
        $tokenInfo = getAccessToken($clientId, $clientSecret, $tokenUrl, $httpClient);
    }

    try {
        $response = $httpClient->post($apiUrl, [
            'json' => $contentData,
            'headers' => [
                'Authorization' => 'Bearer ' . $tokenInfo['access_token'],
                'Content-Type' => 'application/json'
            ]
        ]);

        return json_decode($response->getBody(), true);

    } catch (RequestException $e) {
        throw new Exception("Upload failed: " . $e->getMessage());
    }
}

function processFile($filePath, $publisherId, $apiUrl, &$tokenInfo, $clientId, $clientSecret, $tokenUrl, $httpClient) {
    try {
        if (!file_exists($filePath)) {
            throw new Exception("File does not exist: $filePath");
        }

        $content = file_get_contents($filePath);
        $filename = pathinfo($filePath, PATHINFO_FILENAME);
        $title = str_replace(['_', '-'], ' ', $filename);
        $title = ucwords($title);

        $contentData = [
            'content' => $content,
            'publisherId' => $publisherId,
            'item_title' => $title,
            'author' => ['Automated Ingestion'],
            'publication_date' => date('Y-m-d'),
            'type' => 'Article',
            'pub_type' => 'technical',
            'item_tags' => ['automated', 'ingestion'],
            'evergreen' => true,
            'drm' => ['aspen', 'kallm']
        ];

        $result = uploadContent($contentData, $apiUrl, $tokenInfo, $clientId, $clientSecret, $tokenUrl, $httpClient);
        echo "✅ Successfully uploaded: $title\n";
        echo "   Response: " . $result['message'] . "\n";
        return true;

    } catch (Exception $e) {
        echo "❌ Failed to process $filePath: " . $e->getMessage() . "\n";
        return false;
    }
}

function watchDirectory($watchDirectory, $publisherId, $apiUrl, &$tokenInfo, $clientId, $clientSecret, $tokenUrl, $httpClient) {
    if (!is_dir($watchDirectory)) {
        mkdir($watchDirectory, 0755, true);
        echo "Created watch directory: $watchDirectory\n";
    }

    echo "🔍 Monitoring directory: $watchDirectory\n";
    echo "   Supported file types: .txt, .md\n";
    echo "   Press Ctrl+C to stop\n";

    $processedFiles = [];

    while (true) {
        $files = glob($watchDirectory . '/*.{txt,md}', GLOB_BRACE);

        foreach ($files as $file) {
            $fileTime = filemtime($file);

            if (!isset($processedFiles[$file]) || $processedFiles[$file] < $fileTime) {
                echo "📄 New or updated file detected: $file\n";
                sleep(1); // Allow file write to complete

                if (processFile($file, $publisherId, $apiUrl, $tokenInfo, $clientId, $clientSecret, $tokenUrl, $httpClient)) {
                    $processedFiles[$file] = $fileTime;
                }
            }
        }

        sleep(2); // Check every 2 seconds
    }
}

function batchProcessDirectory($directoryPath, $publisherId, $apiUrl, &$tokenInfo, $clientId, $clientSecret, $tokenUrl, $httpClient) {
    if (!is_dir($directoryPath)) {
        echo "Directory does not exist: $directoryPath\n";
        return;
    }

    $files = glob($directoryPath . '/*.{txt,md}', GLOB_BRACE);
    $processed = 0;
    $failed = 0;

    foreach ($files as $file) {
        if (processFile($file, $publisherId, $apiUrl, $tokenInfo, $clientId, $clientSecret, $tokenUrl, $httpClient)) {
            $processed++;
        } else {
            $failed++;
        }

        // Rate limiting - avoid overwhelming the API
        sleep(1);
    }

    echo "\n📊 Batch processing complete:\n";
    echo "   ✅ Processed: $processed files\n";
    echo "   ❌ Failed: $failed files\n";
}

// --- Main Execution ---
if ($argc < 2) {
    echo "Usage:\n";
    echo "  php index.php watch <directory>     # Monitor directory for new files\n";
    echo "  php index.php batch <directory>     # Process all files in directory\n";
    echo "  php index.php single <file_path>    # Process single file\n";
    exit(1);
}

$command = $argv[1];

try {
    switch ($command) {
        case 'watch':
            if (isset($argv[2])) {
                watchDirectory($argv[2], $PUBLISHER_ID, $API_URL, $tokenInfo, $CLIENT_ID, $CLIENT_SECRET, $TOKEN_URL, $httpClient);
            } else {
                echo "Please specify a directory to watch\n";
            }
            break;
        case 'batch':
            if (isset($argv[2])) {
                batchProcessDirectory($argv[2], $PUBLISHER_ID, $API_URL, $tokenInfo, $CLIENT_ID, $CLIENT_SECRET, $TOKEN_URL, $httpClient);
            } else {
                echo "Please specify a directory to process\n";
            }
            break;
        case 'single':
            if (isset($argv[2])) {
                processFile($argv[2], $PUBLISHER_ID, $API_URL, $tokenInfo, $CLIENT_ID, $CLIENT_SECRET, $TOKEN_URL, $httpClient);
            } else {
                echo "Please specify a file to process\n";
            }
            break;
        default:
            echo "Invalid command. Use watch, batch, or single\n";
    }
} catch (Exception $e) {
    echo "Error: " . $e->getMessage() . "\n";
}
?>
package main

import (
	"bytes"
	"encoding/json"
	"fmt"
	"io/ioutil"
	"net/http"
	"os"
	"path/filepath"
	"strings"
	"time"

	"github.com/fsnotify/fsnotify"
	"github.com/joho/godotenv"
)

// --- Configuration ---
var (
	clientID     string
	clientSecret string
	tokenURL     = "https://platform.ai.gloo.com/oauth2/token"
	apiURL       = "https://platform.ai.gloo.com/ingestion/v1/real_time_upload"
	publisherID  = "b6ada63e-f1ce-4a16-80da-9864f58c5bd7" // Replace with your publisher ID
)

// --- State Management ---
var tokenInfo *TokenInfo

// --- Data Structures ---
type TokenInfo struct {
	AccessToken string `json:"access_token"`
	ExpiresIn   int    `json:"expires_in"`
	ExpiresAt   int64  `json:"expires_at"`
	TokenType   string `json:"token_type"`
}

type ContentData struct {
	Content         string   `json:"content"`
	PublisherID     string   `json:"publisherId"`
	ItemTitle       string   `json:"item_title"`
	Author          []string `json:"author"`
	PublicationDate string   `json:"publication_date"`
	Type            string   `json:"type"`
	PubType         string   `json:"pub_type"`
	ItemTags        []string `json:"item_tags"`
	Evergreen       bool     `json:"evergreen"`
	DRM             []string `json:"drm"`
}

type ApiResponse struct {
	Success           bool        `json:"success"`
	Message           string      `json:"message"`
	TaskID            *string     `json:"task_id"`
	BatchID           *string     `json:"batch_id"`
	ProcessingDetails interface{} `json:"processing_details"`
}

// --- Function Definitions ---
func getAccessToken() (*TokenInfo, error) {
	data := strings.NewReader("grant_type=client_credentials&scope=api/access")
	req, err := http.NewRequest("POST", tokenURL, data)
	if err != nil {
		return nil, err
	}

	req.SetBasicAuth(clientID, clientSecret)
	req.Header.Add("Content-Type", "application/x-www-form-urlencoded")

	client := &http.Client{}
	resp, err := client.Do(req)
	if err != nil {
		return nil, err
	}
	defer resp.Body.Close()

	if resp.StatusCode != http.StatusOK {
		bodyBytes, _ := ioutil.ReadAll(resp.Body)
		return nil, fmt.Errorf("failed to get token: %s - %s", resp.Status, string(bodyBytes))
	}

	body, err := ioutil.ReadAll(resp.Body)
	if err != nil {
		return nil, err
	}

	var localTokenInfo TokenInfo
	if err := json.Unmarshal(body, &localTokenInfo); err != nil {
		return nil, err
	}

	localTokenInfo.ExpiresAt = time.Now().Unix() + int64(localTokenInfo.ExpiresIn)
	return &localTokenInfo, nil
}

func isTokenExpired(token *TokenInfo) bool {
	if token == nil || token.ExpiresAt == 0 {
		return true
	}
	return time.Now().Unix() > (token.ExpiresAt - 60)
}

func uploadContent(contentData *ContentData) (*ApiResponse, error) {
	var err error
	if isTokenExpired(tokenInfo) {
		fmt.Println("Token is expired or missing. Fetching a new one...")
		tokenInfo, err = getAccessToken()
		if err != nil {
			return nil, err
		}
	}

	jsonPayload, _ := json.Marshal(contentData)
	req, err := http.NewRequest("POST", apiURL, bytes.NewBuffer(jsonPayload))
	if err != nil {
		return nil, err
	}

	req.Header.Add("Authorization", "Bearer "+tokenInfo.AccessToken)
	req.Header.Add("Content-Type", "application/json")

	client := &http.Client{}
	resp, err := client.Do(req)
	if err != nil {
		return nil, err
	}
	defer resp.Body.Close()

	body, _ := ioutil.ReadAll(resp.Body)

	if resp.StatusCode != http.StatusOK {
		return nil, fmt.Errorf("API call failed: %s - %s", resp.Status, string(body))
	}

	var result ApiResponse
	json.Unmarshal(body, &result)
	return &result, nil
}

func processFile(filePath string) bool {
	content, err := ioutil.ReadFile(filePath)
	if err != nil {
		fmt.Printf("❌ Failed to read file %s: %v\n", filePath, err)
		return false
	}

	filename := filepath.Base(filePath)
	title := strings.TrimSuffix(filename, filepath.Ext(filename))
	title = strings.ReplaceAll(title, "_", " ")
	title = strings.ReplaceAll(title, "-", " ")
	title = strings.Title(title)

	contentData := &ContentData{
		Content:         string(content),
		PublisherID:     publisherID,
		ItemTitle:       title,
		Author:          []string{"Automated Ingestion"},
		PublicationDate: time.Now().Format("2006-01-02"),
		Type:            "Article",
		PubType:         "technical",
		ItemTags:        []string{"automated", "ingestion"},
		Evergreen:       true,
		DRM:             []string{"aspen", "kallm"},
	}

	result, err := uploadContent(contentData)
	if err != nil {
		fmt.Printf("❌ Failed to process %s: %v\n", filePath, err)
		return false
	}

	fmt.Printf("✅ Successfully uploaded: %s\n", title)
	fmt.Printf("   Response: %s\n", result.Message)
	return true
}

func watchDirectory(watchDir string) error {
	// Create directory if it doesn't exist
	if _, err := os.Stat(watchDir); os.IsNotExist(err) {
		os.MkdirAll(watchDir, 0755)
		fmt.Printf("Created watch directory: %s\n", watchDir)
	}

	watcher, err := fsnotify.NewWatcher()
	if err != nil {
		return err
	}
	defer watcher.Close()

	fmt.Printf("🔍 Monitoring directory: %s\n", watchDir)
	fmt.Println("   Supported file types: .txt, .md")
	fmt.Println("   Press Ctrl+C to stop")

	err = watcher.Add(watchDir)
	if err != nil {
		return err
	}

	done := make(chan bool)

	go func() {
		for {
			select {
			case event, ok := <-watcher.Events:
				if !ok {
					return
				}
				if event.Op&fsnotify.Create == fsnotify.Create {
					ext := filepath.Ext(event.Name)
					if ext == ".txt" || ext == ".md" {
						fmt.Printf("📄 New file detected: %s\n", event.Name)
						time.Sleep(1 * time.Second) // Allow file write to complete
						processFile(event.Name)
					}
				}
			case err, ok := <-watcher.Errors:
				if !ok {
					return
				}
				fmt.Printf("Error: %v\n", err)
			}
		}
	}()

	<-done
	return nil
}

func batchProcessDirectory(dirPath string) {
	if _, err := os.Stat(dirPath); os.IsNotExist(err) {
		fmt.Printf("Directory does not exist: %s\n", dirPath)
		return
	}

	files, err := filepath.Glob(filepath.Join(dirPath, "*.txt"))
	if err != nil {
		fmt.Printf("Error reading directory: %v\n", err)
		return
	}

	mdFiles, err := filepath.Glob(filepath.Join(dirPath, "*.md"))
	if err != nil {
		fmt.Printf("Error reading directory: %v\n", err)
		return
	}

	files = append(files, mdFiles...)

	processed := 0
	failed := 0

	for _, file := range files {
		if processFile(file) {
			processed++
		} else {
			failed++
		}
		// Rate limiting - avoid overwhelming the API
		time.Sleep(1 * time.Second)
	}

	fmt.Printf("\n📊 Batch processing complete:\n")
	fmt.Printf("   ✅ Processed: %d files\n", processed)
	fmt.Printf("   ❌ Failed: %d files\n", failed)
}

// Helper to get environment variables
func getEnv(key, fallback string) string {
	if value, ok := os.LookupEnv(key); ok {
		return value
	}
	return fallback
}

// Initialize loads environment variables and validates configuration
func init() {
	// Load environment variables from .env file if it exists
	_ = godotenv.Load()

	// Get credentials from environment
	clientID = getEnv("GLOO_CLIENT_ID", "")
	clientSecret = getEnv("GLOO_CLIENT_SECRET", "")

	// Validate that credentials are provided
	if clientID == "" || clientSecret == "" {
		fmt.Println("Error: GLOO_CLIENT_ID and GLOO_CLIENT_SECRET must be set")
		fmt.Println("Either:")
		fmt.Println("1. Create a .env file with your credentials:")
		fmt.Println("   GLOO_CLIENT_ID=your_client_id_here")
		fmt.Println("   GLOO_CLIENT_SECRET=your_client_secret_here")
		fmt.Println("2. Export them as environment variables:")
		fmt.Println("   export GLOO_CLIENT_ID=\"your_client_id_here\"")
		fmt.Println("   export GLOO_CLIENT_SECRET=\"your_client_secret_here\"")
		os.Exit(1)
	}
}

// --- Main Execution ---
func main() {
	if len(os.Args) < 2 {
		fmt.Println("Usage:")
		fmt.Println("  go run main.go watch <directory>     # Monitor directory for new files")
		fmt.Println("  go run main.go batch <directory>     # Process all files in directory")
		fmt.Println("  go run main.go single <file_path>    # Process single file")
		os.Exit(1)
	}

	command := os.Args[1]

	switch command {
	case "watch":
		if len(os.Args) > 2 {
			if err := watchDirectory(os.Args[2]); err != nil {
				fmt.Printf("Error watching directory: %v\n", err)
			}
		} else {
			fmt.Println("Please specify a directory to watch")
		}
	case "batch":
		if len(os.Args) > 2 {
			batchProcessDirectory(os.Args[2])
		} else {
			fmt.Println("Please specify a directory to process")
		}
	case "single":
		if len(os.Args) > 2 {
			processFile(os.Args[2])
		} else {
			fmt.Println("Please specify a file to process")
		}
	default:
		fmt.Println("Invalid command. Use watch, batch, or single")
	}
}
import com.google.gson.Gson;
import com.google.gson.JsonObject;
import io.github.cdimascio.dotenv.Dotenv;

import java.io.IOException;
import java.net.URI;
import java.net.http.HttpClient;
import java.net.http.HttpRequest;
import java.net.http.HttpResponse;
import java.nio.file.*;
import java.time.Instant;
import java.time.LocalDate;
import java.util.Base64;
import java.util.List;
import java.util.concurrent.CompletableFuture;
import java.util.stream.Stream;

// --- Main Application Class ---
public class Main {
    public static void main(String[] args) {
        if (!RealtimeIngestion.validateCredentials()) {
            System.exit(1);
        }

        if (args.length < 1) {
            System.out.println("Usage:");
            System.out.println("  java Main watch <directory>     # Monitor directory for new files");
            System.out.println("  java Main batch <directory>     # Process all files in directory");
            System.out.println("  java Main single <file_path>    # Process single file");
            System.exit(1);
        }

        RealtimeIngestion ingestion = new RealtimeIngestion();
        String command = args[0];

        try {
            switch (command) {
                case "watch":
                    if (args.length > 1) {
                        ingestion.watchDirectory(args[1]);
                    } else {
                        System.out.println("Please specify a directory to watch");
                    }
                    break;
                case "batch":
                    if (args.length > 1) {
                        ingestion.batchProcessDirectory(args[1]);
                    } else {
                        System.out.println("Please specify a directory to process");
                    }
                    break;
                case "single":
                    if (args.length > 1) {
                        ingestion.processFile(args[1]);
                    } else {
                        System.out.println("Please specify a file to process");
                    }
                    break;
                default:
                    System.out.println("Invalid command. Use watch, batch, or single");
            }
        } catch (Exception e) {
            e.printStackTrace();
        }
    }
}

// --- Realtime Ingestion Class ---
class RealtimeIngestion {
    // Load environment variables from .env file if it exists
    private static final Dotenv dotenv = Dotenv.configure()
            .ignoreIfMissing()
            .load();

    private static final String CLIENT_ID = dotenv.get("GLOO_CLIENT_ID", "YOUR_CLIENT_ID");
    private static final String CLIENT_SECRET = dotenv.get("GLOO_CLIENT_SECRET", "YOUR_CLIENT_SECRET");
    private static final String TOKEN_URL = "https://platform.ai.gloo.com/oauth2/token";
    private static final String API_URL = "https://platform.ai.gloo.com/ingestion/v1/real_time_upload";
    private static final String PUBLISHER_ID = "b6ada63e-f1ce-4a16-80da-9864f58c5bd7"; // Replace with your publisher ID

    private TokenInfo tokenInfo;
    private final HttpClient httpClient = HttpClient.newHttpClient();
    private final Gson gson = new Gson();

    // Validate that credentials are provided
    public static boolean validateCredentials() {
        if ("YOUR_CLIENT_ID".equals(CLIENT_ID) || CLIENT_ID == null || CLIENT_ID.trim().isEmpty() ||
            "YOUR_CLIENT_SECRET".equals(CLIENT_SECRET) || CLIENT_SECRET == null || CLIENT_SECRET.trim().isEmpty()) {
            System.err.println("Error: GLOO_CLIENT_ID and GLOO_CLIENT_SECRET must be set");
            System.err.println("Create a .env file with your credentials:");
            System.err.println("GLOO_CLIENT_ID=your_client_id_here");
            System.err.println("GLOO_CLIENT_SECRET=your_client_secret_here");
            return false;
        }
        return true;
    }

    // --- Data Classes ---
    static class TokenInfo {
        String access_token;
        int expires_in;
        long expires_at;
    }

    static class ContentData {
        String content;
        String publisherId;
        String item_title;
        String[] author;
        String publication_date;
        String type;
        String pub_type;
        String[] item_tags;
        boolean evergreen;
        String[] drm;

        public ContentData(String content, String publisherId, String itemTitle) {
            this.content = content;
            this.publisherId = publisherId;
            this.item_title = itemTitle;
            this.author = new String[]{"Automated Ingestion"};
            this.publication_date = LocalDate.now().toString();
            this.type = "Article";
            this.pub_type = "technical";
            this.item_tags = new String[]{"automated", "ingestion"};
            this.evergreen = true;
            this.drm = new String[]{"aspen", "kallm"};
        }
    }

    static class ApiResponse {
        boolean success;
        String message;
        String task_id;
        String batch_id;
        Object processing_details;
    }

    // --- Token Management ---
    private void fetchAccessToken() throws IOException, InterruptedException {
        String auth = CLIENT_ID + ":" + CLIENT_SECRET;
        String encodedAuth = Base64.getEncoder().encodeToString(auth.getBytes());
        String requestBody = "grant_type=client_credentials&scope=api/access";

        HttpRequest request = HttpRequest.newBuilder()
                .uri(URI.create(TOKEN_URL))
                .header("Content-Type", "application/x-www-form-urlencoded")
                .header("Authorization", "Basic " + encodedAuth)
                .POST(HttpRequest.BodyPublishers.ofString(requestBody))
                .build();

        HttpResponse<String> response = httpClient.send(request, HttpResponse.BodyHandlers.ofString());
        if (response.statusCode() != 200) {
            throw new IOException("Failed to get token: " + response.body());
        }

        this.tokenInfo = gson.fromJson(response.body(), TokenInfo.class);
        this.tokenInfo.expires_at = Instant.now().getEpochSecond() + this.tokenInfo.expires_in;
    }

    private boolean isTokenExpired() {
        if (this.tokenInfo == null || this.tokenInfo.expires_at == 0) return true;
        return Instant.now().getEpochSecond() > (this.tokenInfo.expires_at - 60);
    }

    // --- API Methods ---
    public ApiResponse uploadContent(ContentData contentData) throws IOException, InterruptedException {
        if (isTokenExpired()) {
            System.out.println("Token is expired or missing. Fetching a new one...");
            fetchAccessToken();
        }

        String jsonPayload = gson.toJson(contentData);
        HttpRequest request = HttpRequest.newBuilder()
                .uri(URI.create(API_URL))
                .header("Content-Type", "application/json")
                .header("Authorization", "Bearer " + this.tokenInfo.access_token)
                .POST(HttpRequest.BodyPublishers.ofString(jsonPayload))
                .build();

        HttpResponse<String> response = httpClient.send(request, HttpResponse.BodyHandlers.ofString());
        if (response.statusCode() != 200) {
            throw new IOException("API call failed: " + response.body());
        }

        return gson.fromJson(response.body(), ApiResponse.class);
    }

    public boolean processFile(String filePath) {
        try {
            Path path = Paths.get(filePath);
            if (!Files.exists(path)) {
                System.out.println("❌ File does not exist: " + filePath);
                return false;
            }

            String content = Files.readString(path);
            String filename = path.getFileName().toString();
            String title = filename.replaceAll("\\.(txt|md)$", "")
                                 .replaceAll("[_-]", " ")
                                 .replaceAll("\\b\\w", m -> m.toUpperCase());

            ContentData contentData = new ContentData(content, PUBLISHER_ID, title);
            ApiResponse result = uploadContent(contentData);

            System.out.println("✅ Successfully uploaded: " + title);
            System.out.println("   Response: " + result.message);
            return true;

        } catch (Exception e) {
            System.out.println("❌ Failed to process " + filePath + ": " + e.getMessage());
            return false;
        }
    }

    public void watchDirectory(String watchDir) throws IOException, InterruptedException {
        Path dir = Paths.get(watchDir);
        if (!Files.exists(dir)) {
            Files.createDirectories(dir);
            System.out.println("Created watch directory: " + watchDir);
        }

        System.out.println("🔍 Monitoring directory: " + watchDir);
        System.out.println("   Supported file types: .txt, .md");
        System.out.println("   Press Ctrl+C to stop");

        WatchService watchService = FileSystems.getDefault().newWatchService();
        dir.register(watchService, StandardWatchEventKinds.ENTRY_CREATE);

        while (true) {
            WatchKey key = watchService.take();
            for (WatchEvent<?> event : key.pollEvents()) {
                if (event.kind() == StandardWatchEventKinds.ENTRY_CREATE) {
                    Path createdFile = dir.resolve((Path) event.context());
                    String fileName = createdFile.toString();

                    if (fileName.endsWith(".txt") || fileName.endsWith(".md")) {
                        System.out.println("📄 New file detected: " + createdFile);
                        // Small delay to ensure file write is complete
                        Thread.sleep(1000);
                        processFile(createdFile.toString());
                    }
                }
            }
            key.reset();
        }
    }

    public void batchProcessDirectory(String dirPath) {
        Path dir = Paths.get(dirPath);
        if (!Files.exists(dir)) {
            System.out.println("Directory does not exist: " + dirPath);
            return;
        }

        int processed = 0;
        int failed = 0;

        try (Stream<Path> files = Files.walk(dir, 1)) {
            List<Path> supportedFiles = files
                    .filter(Files::isRegularFile)
                    .filter(p -> p.toString().endsWith(".txt") || p.toString().endsWith(".md"))
                    .toList();

            for (Path file : supportedFiles) {
                if (processFile(file.toString())) {
                    processed++;
                } else {
                    failed++;
                }

                // Rate limiting - avoid overwhelming the API
                Thread.sleep(1000);
            }
        } catch (Exception e) {
            System.out.println("Error processing directory: " + e.getMessage());
        }

        System.out.println("\n📊 Batch processing complete:");
        System.out.println("   ✅ Processed: " + processed + " files");
        System.out.println("   ❌ Failed: " + failed + " files");
    }
}
Testing Your Implementation
To test any of the complete examples:1. Environment Setup
Create a.env file with your Gloo AI credentials:
GLOO_CLIENT_ID=your_actual_client_id
GLOO_CLIENT_SECRET=your_actual_client_secret
2. Install Dependencies
Each language has specific setup requirements - check the README files in the sandbox examples.3. Test Single File Upload
# Create a test file
echo "This is a test article about automated content ingestion." > test_content.txt

# Upload the file
python main.py single test_content.txt
4. Test Directory Monitoring
# Start monitoring a directory
python main.py watch ./watch_folder

# In another terminal, add files to the directory
echo "New content article" > ./watch_folder/new_article.txt
5. Test Batch Processing
# Create multiple test files
mkdir batch_test
echo "Article 1 content" > batch_test/article1.txt
echo "Article 2 content" > batch_test/article2.md

# Process all files
python main.py batch ./batch_test
- Automatically handle token retrieval and refresh
- Extract metadata from filenames and content
- Upload content with proper error handling
- Display success/failure status for each operation
- Provide structured JSON responses from the API
Production Deployment Considerations
Error Handling
- Authentication: Automatic token refresh with exponential backoff
- Rate Limiting: Built-in delays between API calls
- Network Issues: Retry logic with configurable timeouts
- File Processing: Validation and error recovery
Monitoring
- Logging: Structured logs for all operations
- Metrics: Success rates, processing times, error counts
- Alerting: Failed upload notifications
- Health Checks: System status monitoring
Scaling
- Concurrent Processing: Parallel file processing capabilities
- Queue Management: Async processing for high-volume scenarios
- Resource Management: Memory and CPU optimization
- Load Balancing: Multiple instance coordination
Working Code Sample
View Complete Code
Clone or browse the complete working examples for all 6 languages (JavaScript,
TypeScript, Python, PHP, Go, Java) with setup instructions.
Next Steps
Now that you have a working content ingestion pipeline, consider exploring:- Search API - Query your ingested content
- Chat Integration - Use ingested content in conversations
- Content Management - Organize and categorize content
- Advanced Metadata - Rich content classification and tagging
- Custom Pipelines - The source-agnostic pattern for integrating with a CMS, API, database, file library, or RSS feed