- You can prototype, iterate and create full-stack applications in minutes instead of hours, days, or even weeks.
- You don’t need deep expertise on UI/UX, databases, APIs, and so on.
- You can focus on what you want your app to do rather than integration details.
Technical expertise is very helpful when you run into errors or need to scale your application for production environments. The right prompting techniques can help you avoid many common pitfalls.
Prerequisites
Before starting, ensure you have:- A Gloo AI Studio account
- Your Client ID and Client Secret from the API Credentials page
- Access to an AI coding assistant (Bolt.new, Lovable, Replit Agent, Claude Code, Codex, etc.)
- Basic understanding of web applications (frontend + backend)
Note: If you prefer to code manually, start with our Authentication Tutorial and other hands-on tutorials.
How This Tutorial Works
This tutorial is different from traditional code tutorials. Instead of showing you code to copy, we’ll show you prompts that generate the code for you. The process:- Choose your use case (chat app, tool use, etc.)
- Copy the prompt from this tutorial
- Paste into your AI coding assistant (Bolt.new, Lovable, Replit Agent, Claude Code, Codex, etc.)
- Generate the app
- Test and deploy the generated app
- Clear objective (what you’re building)
- Specific architecture (React, Vue, serverless, etc.)
- Complete authentication pattern (OAuth2 with token caching)
- Exact API endpoints and request/response formats
- UI/UX requirements (mobile-responsive, loading states, etc.)
Step 1: Understanding Prompt Structure
Before we dive into specific examples, let’s understand what makes an effective prompt for building Gloo AI applications. Every effective prompt has five components:1. Clear Objective
Start with a single sentence describing what you’re building.- ❌ Bad: “Make a chat thing”
- ✅ Good: “Build a chat application that connects to Gloo AI with streaming responses”
2. Architecture Requirements
Specify your tech stack so the AI generates appropriate code.- Frontend: React, Vue, Next.js, vanilla JavaScript
- Backend: Node.js/Express, serverless functions, backend functions, Python/Flask
- Important: Always separate frontend and backend for secure authentication
3. Authentication Flow
Always include instructions to ensure OAuth2 authentication is implemented securely. The key? Never expose credentials in frontend code. The figure below shows the flow for a properly authenticated Gloo AI API call.

4. API Interaction Details
Be specific about:- What the frontend sends to your backend
- What your backend sends to Gloo AI (exact endpoint, headers, body)
- What your backend returns to the frontend
5. UI/UX Requirements
Describe the user experience:- Visual layout (chat bubbles, forms, cards)
- Interactive elements (buttons, inputs, dropdowns)
- Feedback mechanisms (loading states, errors, success messages)
- Responsive design needs
Step 2: Choose Your Starting Point
Select an example prompt from the three examples in this section. We’ve prepared these tested prompts for common use cases. Start with Example 1 (Chat Application) if you’re new to this approach. Each example includes:- When to use this pattern
- Which platforms we’ve tested on
- The complete prompt ready to copy
Example 1: Chat Application (with Streaming Support)
What you’ll get: A chat app with real-time, typewriter-style AI responses When to use this:- Want immediate feedback as AI generates responses
- Need to handle long responses gracefully
- Want users to see progress in real-time
| Component | Where in Prompt | Example Text |
|---|---|---|
| 1. Clear Objective | First sentence | ”Build a chat app with real-time streaming responses from Gloo AI.” |
| 2. Architecture Requirements | Second sentence | ”OAuth2 authentication in backend; frontend receives SSE stream.” |
| 3. Authentication Flow | ”Auth:” section | ”Use OAuth2 client credentials flow for authentication: 1. Backend exchanges client_id + client_secret…“ |
| 4. API Interaction Details | ”Streaming flow:” section | Frontend initiates:POST /api/chat/streamBackend calls Gloo AI: POST https://.../ai/v2/chat/completionsBackend forwards SSE chunks to frontend |
| 5. UI/UX Requirements | ”UI Requirements:” section | ”- Typewriter effect for AI responses…” |
Example 2: Completions with Tool Use
What you’ll get: An application that returns structured, predictable JSON responses. When to use this:- You need consistent data formats (not free-form text)
- Building forms, assessments, or data extraction tools
- Need machine-readable output for downstream processing
- Want type-safe responses with validation
- Personal growth plans
- Recipe generation with structured ingredients
- Data extraction from text into structured format
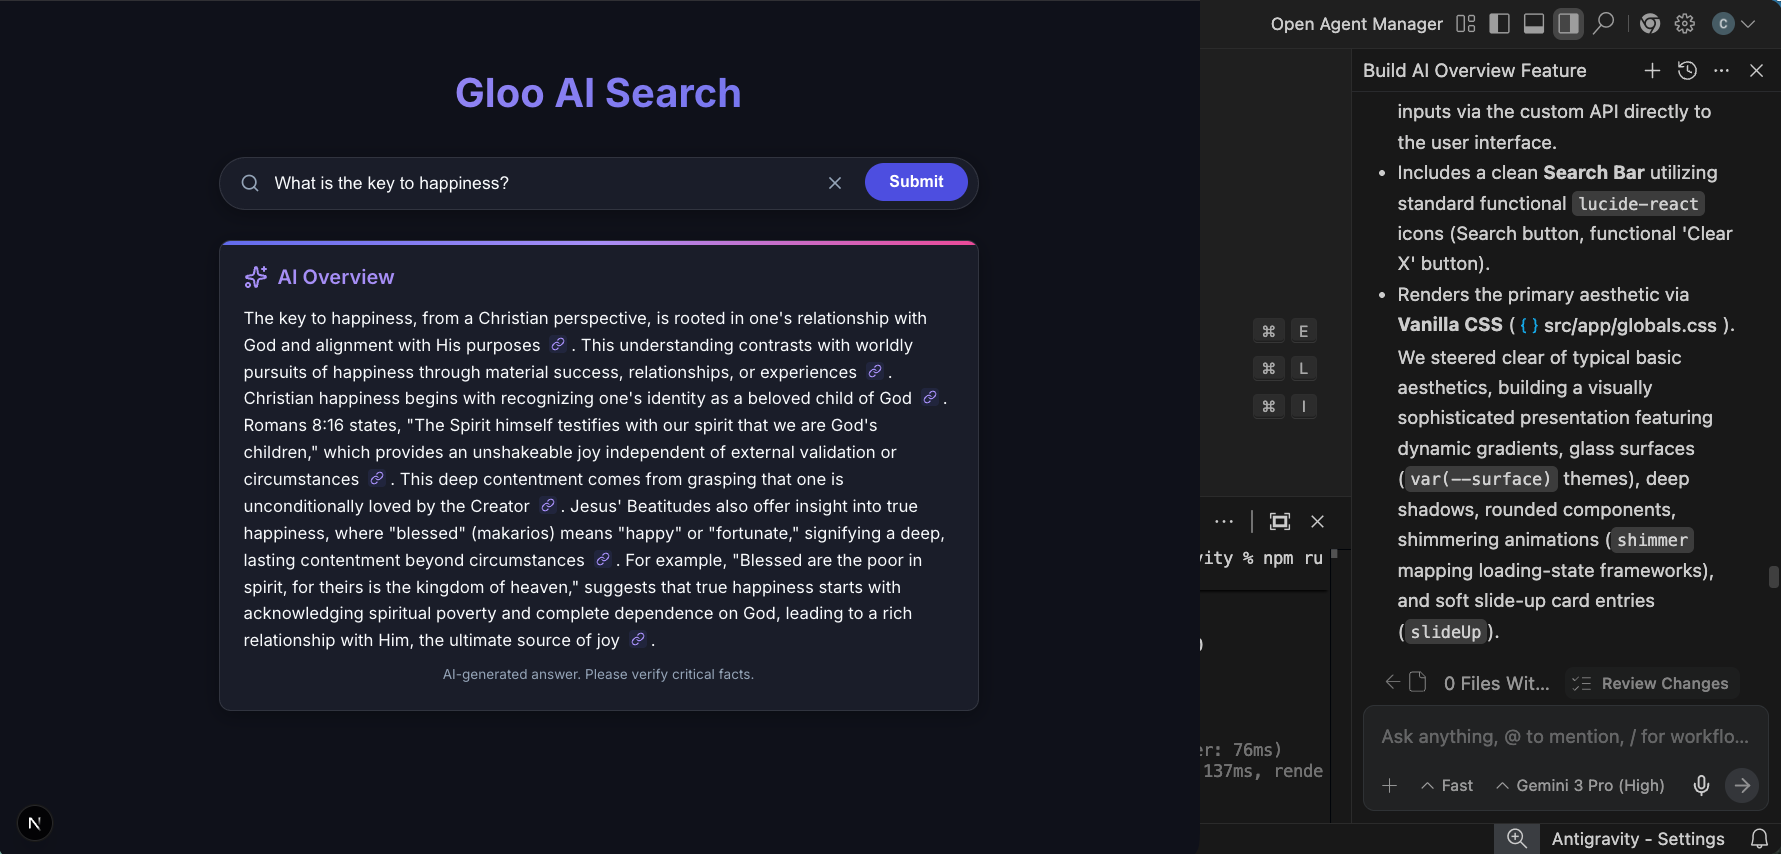
Example 3: Building AI Overviews
What you’ll get: An AI Overview feature that retrieves relevant snippets and generates a grounded answer with inline citations.This example uses item recommendations functionality that requires you to have a Pro or Enterprise plan as well as content uploaded to your content library.
- You want a search-first experience with synthesized answers
- You need source-aware responses with explicit citation mapping
- You want a UI pattern similar to AI overview cards
Step 3: Generate Your Application
After copying a prompt to your AI coding assistant, follow these steps:1. Set Up Your Gloo AI Credentials
- Enter your Gloo AI credentials if prompted during code generation. This typically applies to coding assistants that generate code online such as Lovable and Replit Agent.
- Enter your credentials as instructed after code generation. This typically applies to assistants that create code locally such as Claude Code and Codex.
2. Enter Your Publisher and Tenant (Example 3 Only)
If you’re using Example 3 (Building AI Overviews), you’ll need to provide two additional values before your app will work:- Publisher — name of your publisher
- Tenant — tenant identifier
- Navigate to the “Manage Organizations” page.
- In your organization’s row, click on “View Publishers”.
- Note the publisher name.
- The tenant identifier is derived from the publisher name by removing any spaces. For example, if your publisher name is “Faith Matters,” the tenant identifier would be “FaithMatters.”
3. Review the Generated Code
- Check that OAuth2 authentication is in the backend only
- Verify environment variables are properly configured
- Ensure error handling is present for 401, 429, 500 errors
- Confirm token caching is implemented
4. Start the Application
Online coding tools will automatically start your app in a Preview tab. For locally generated code:- Follow instructions (typically in a README) to install dependencies
- Start the backend and frontend servers
Step 4: Test Your Application
Once your app is running, check that it’s working well.Example 1: Chat Application (with Streaming Support)
Enter a message and ensure the results are streamed in. You should see something like this: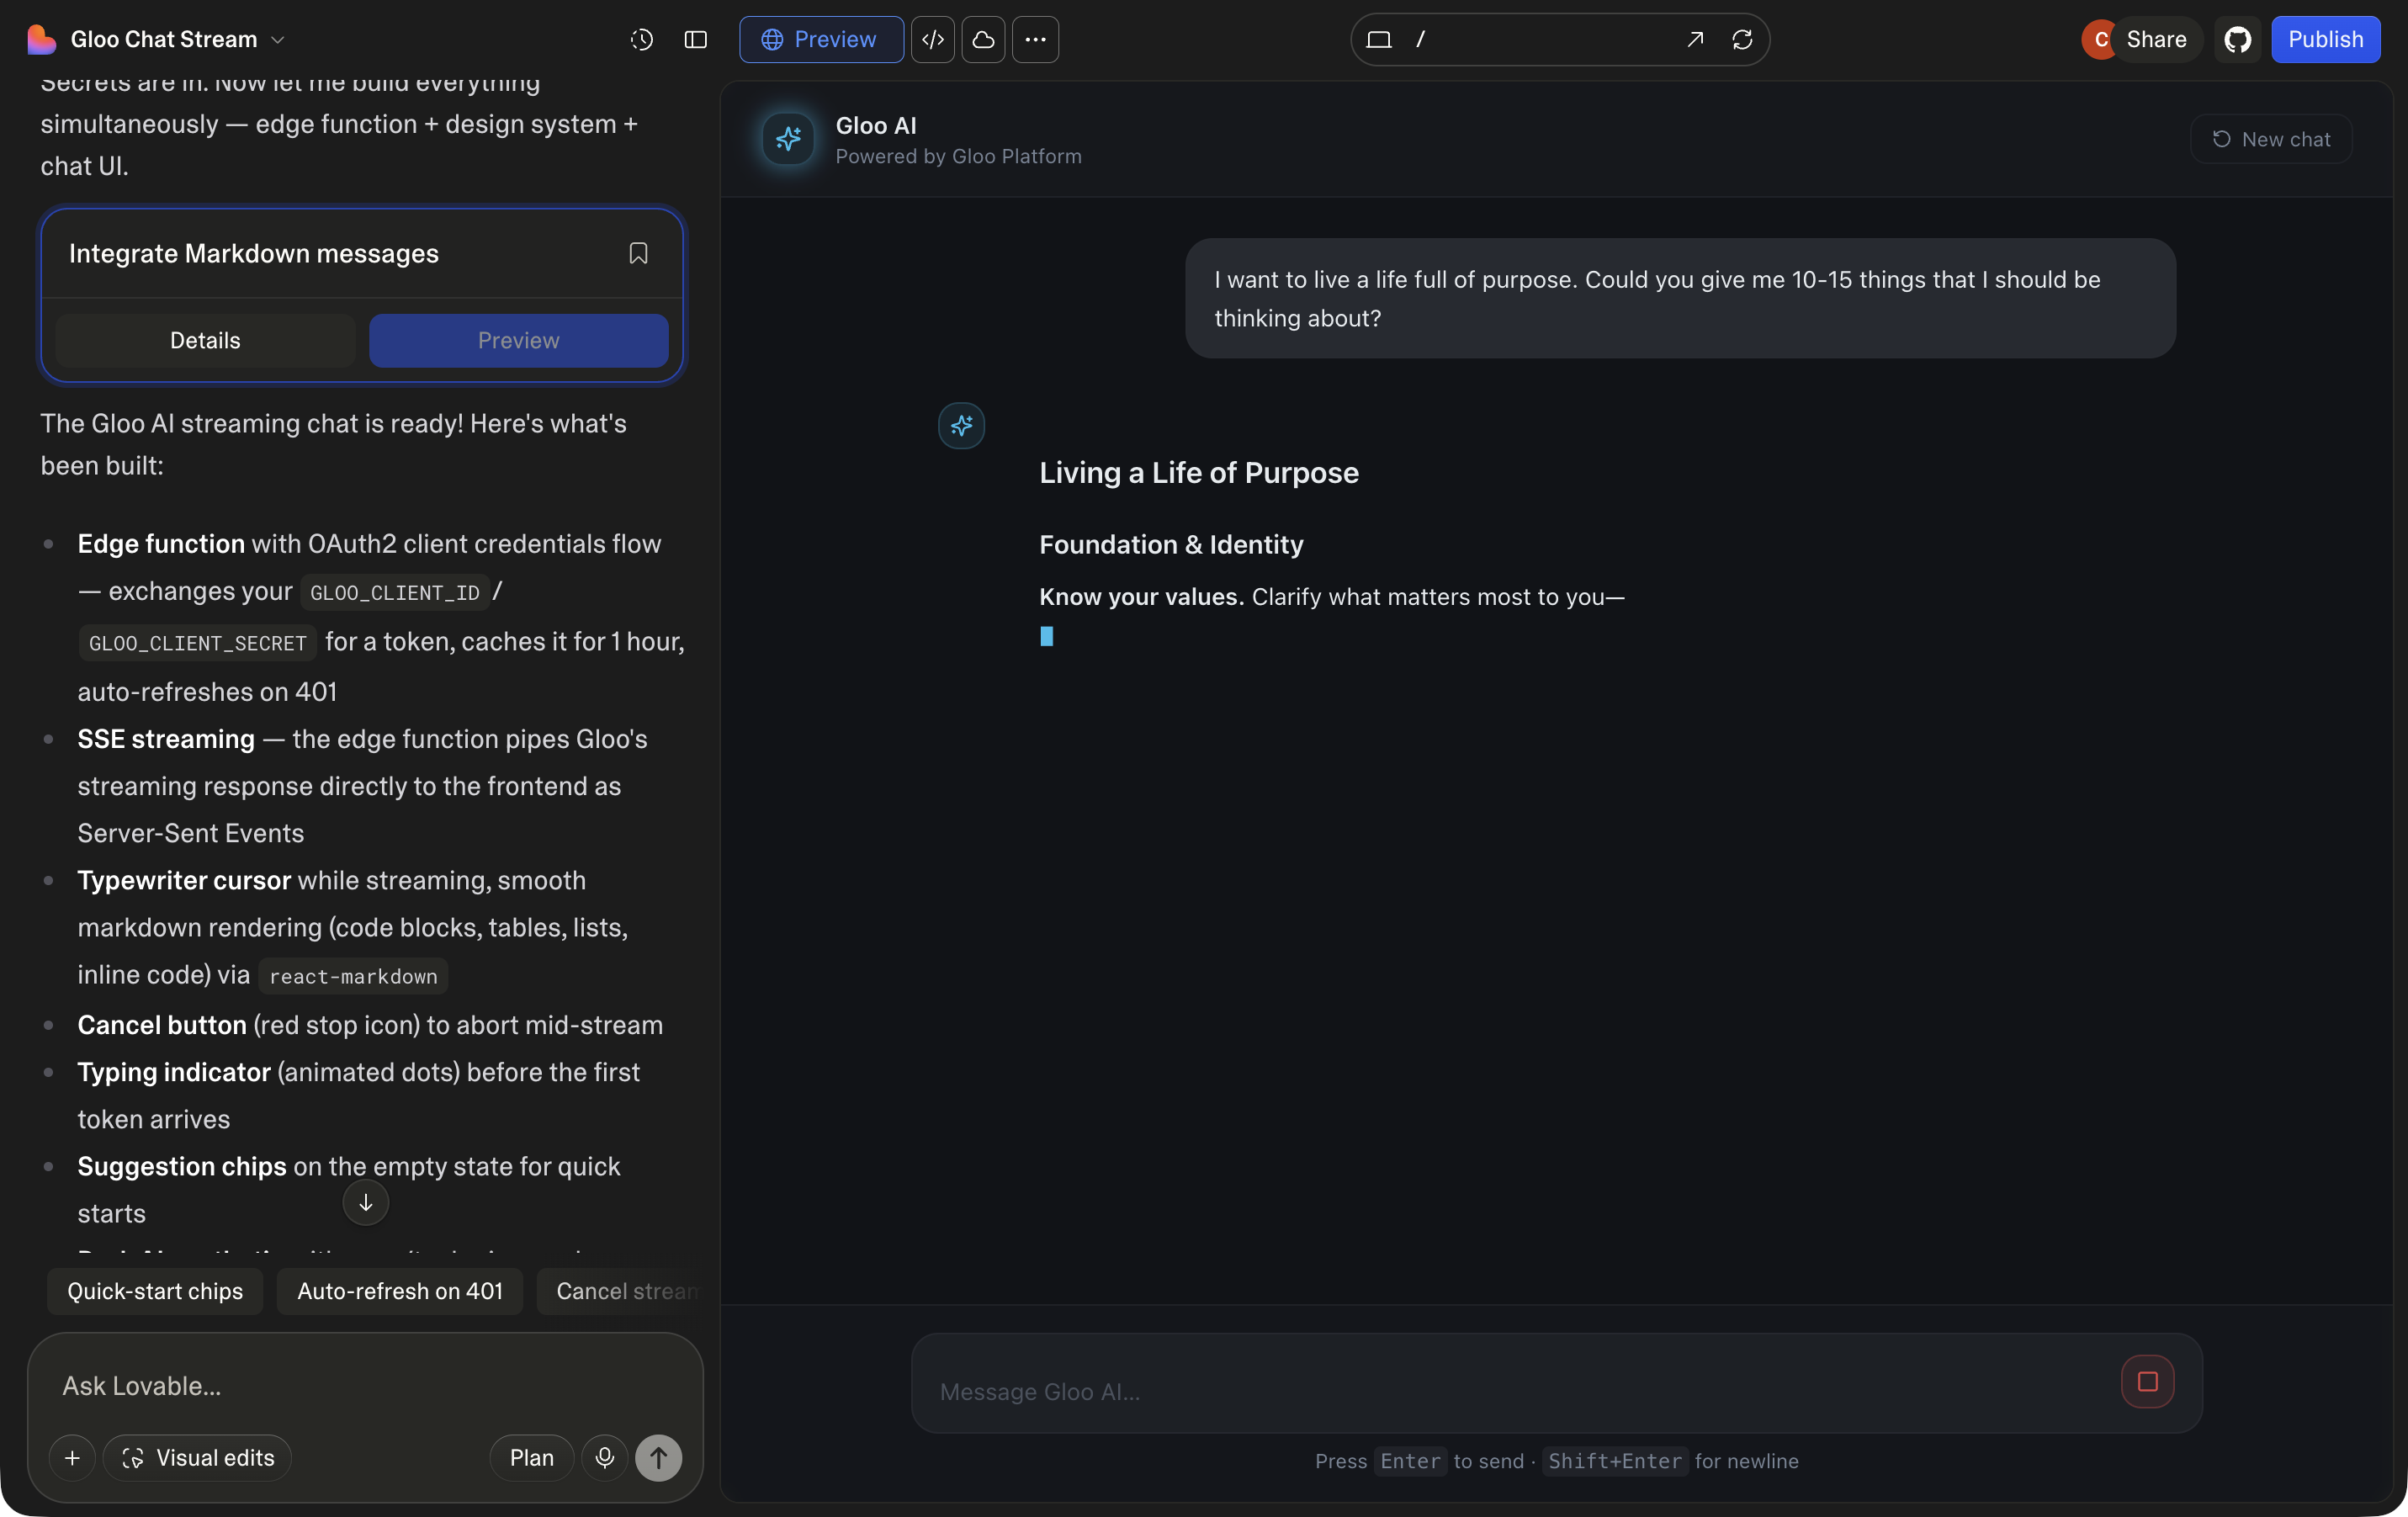
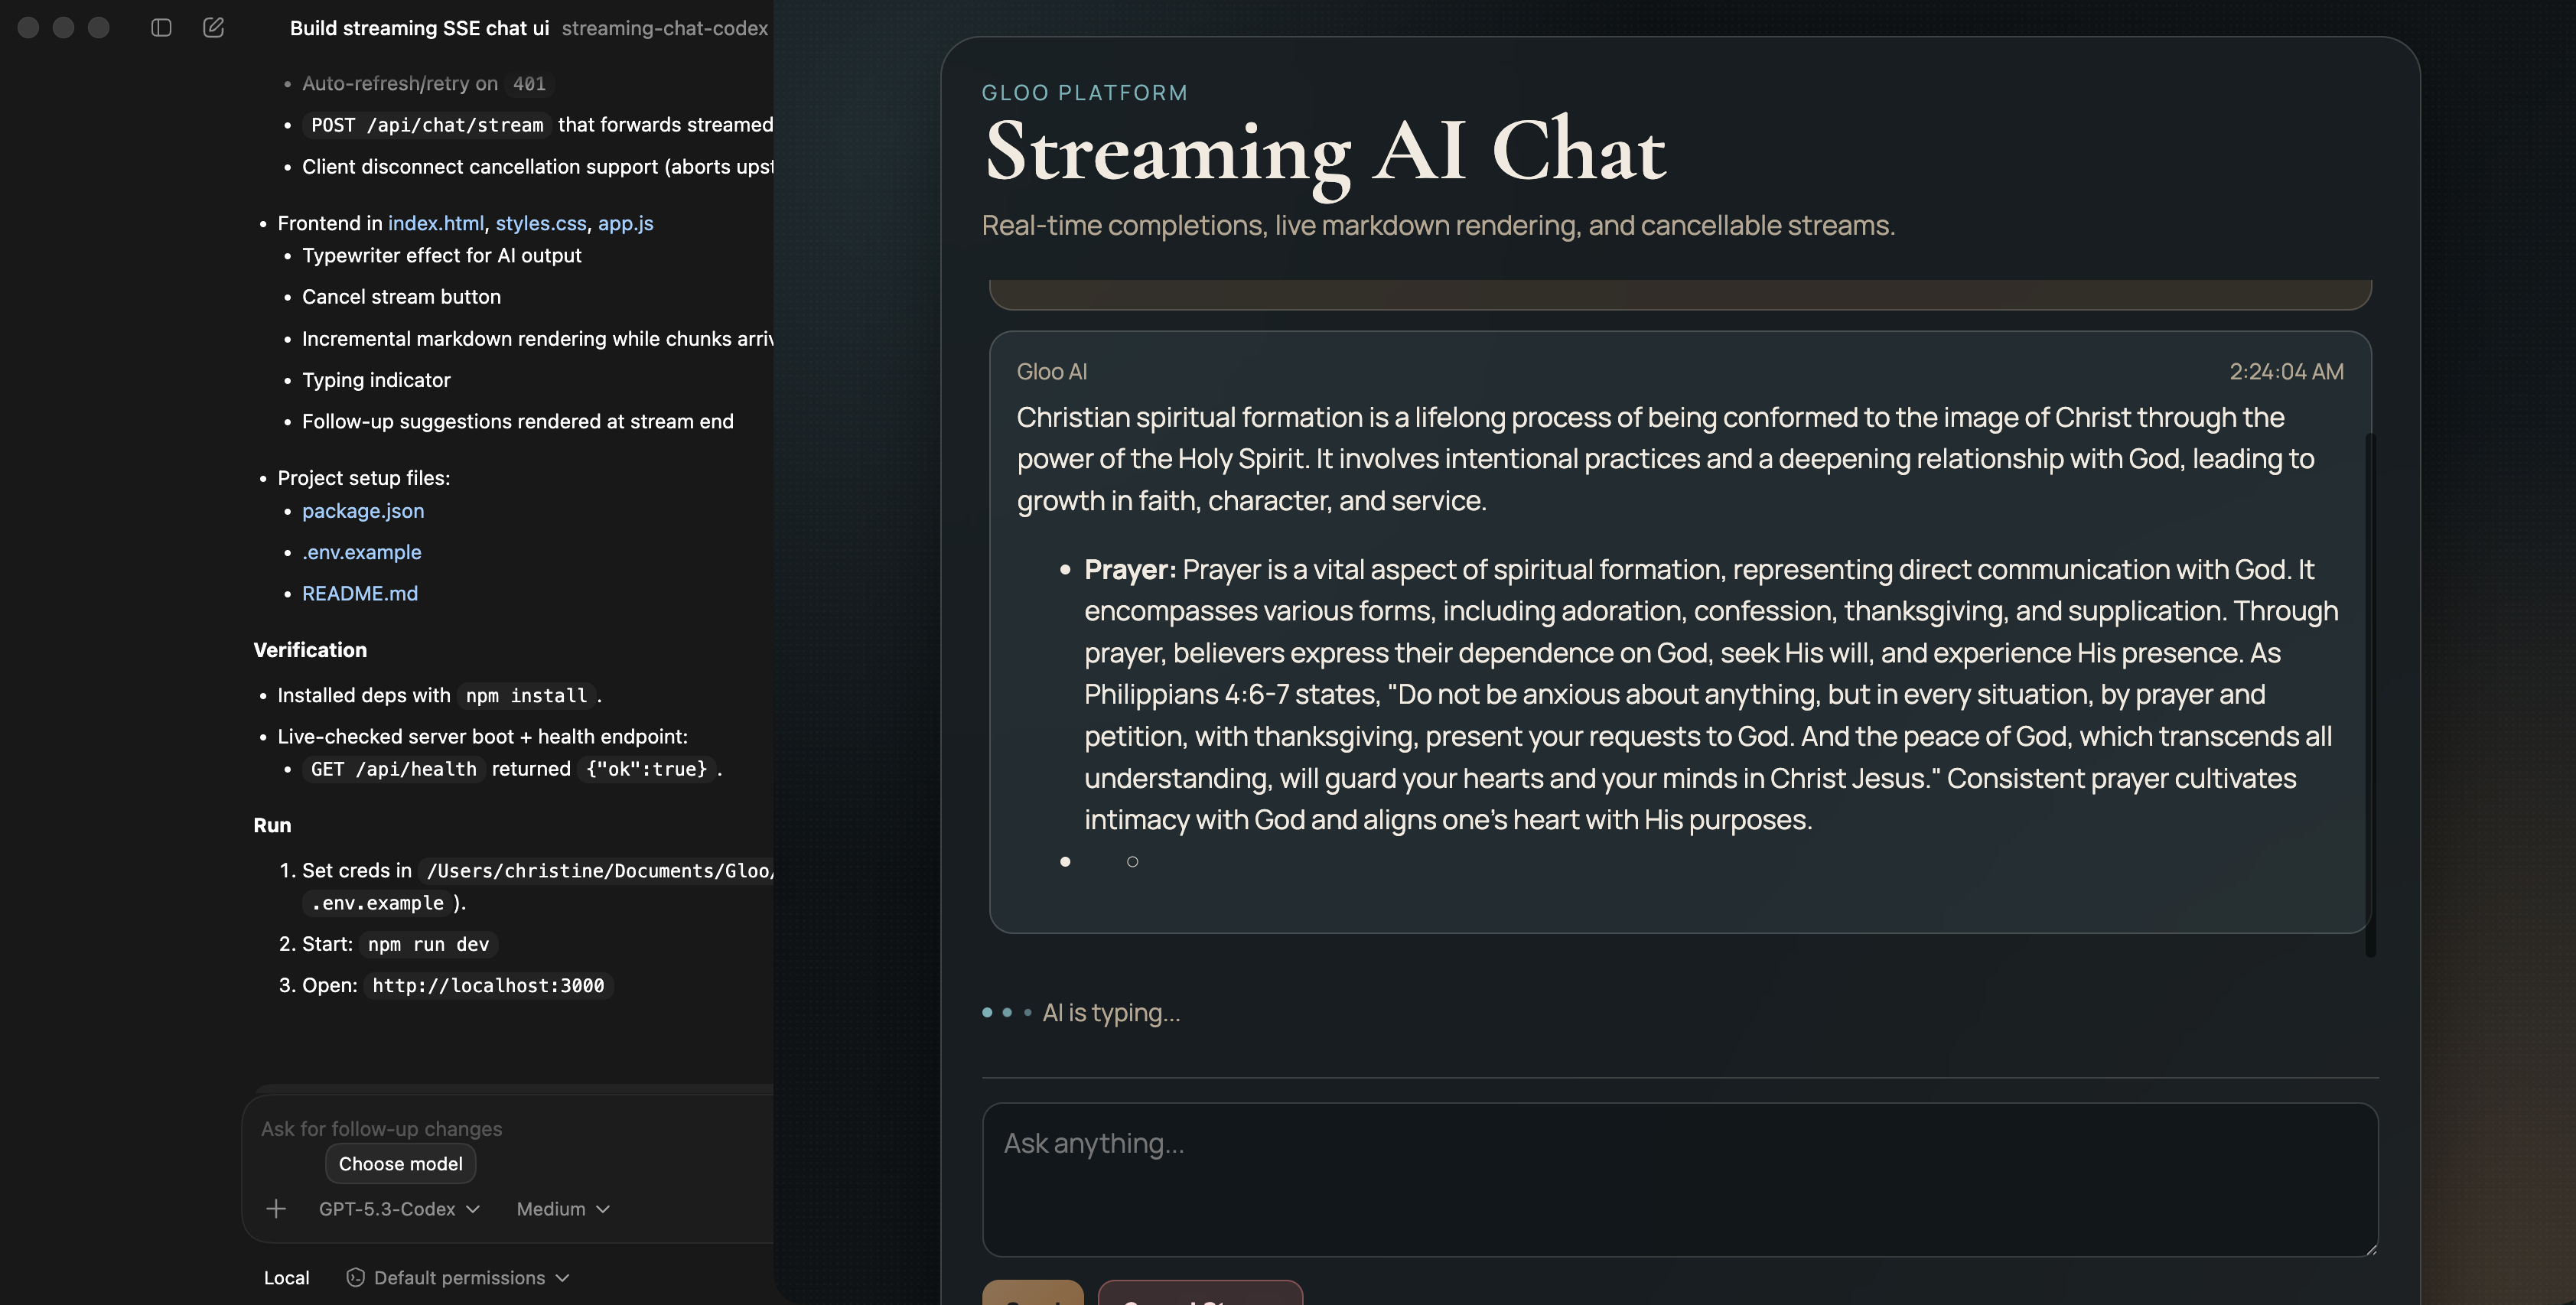
Because these coding models are generative, the app UI will vary with each run — even using identical prompts. However, the overall functionality should consistently match your specifications.
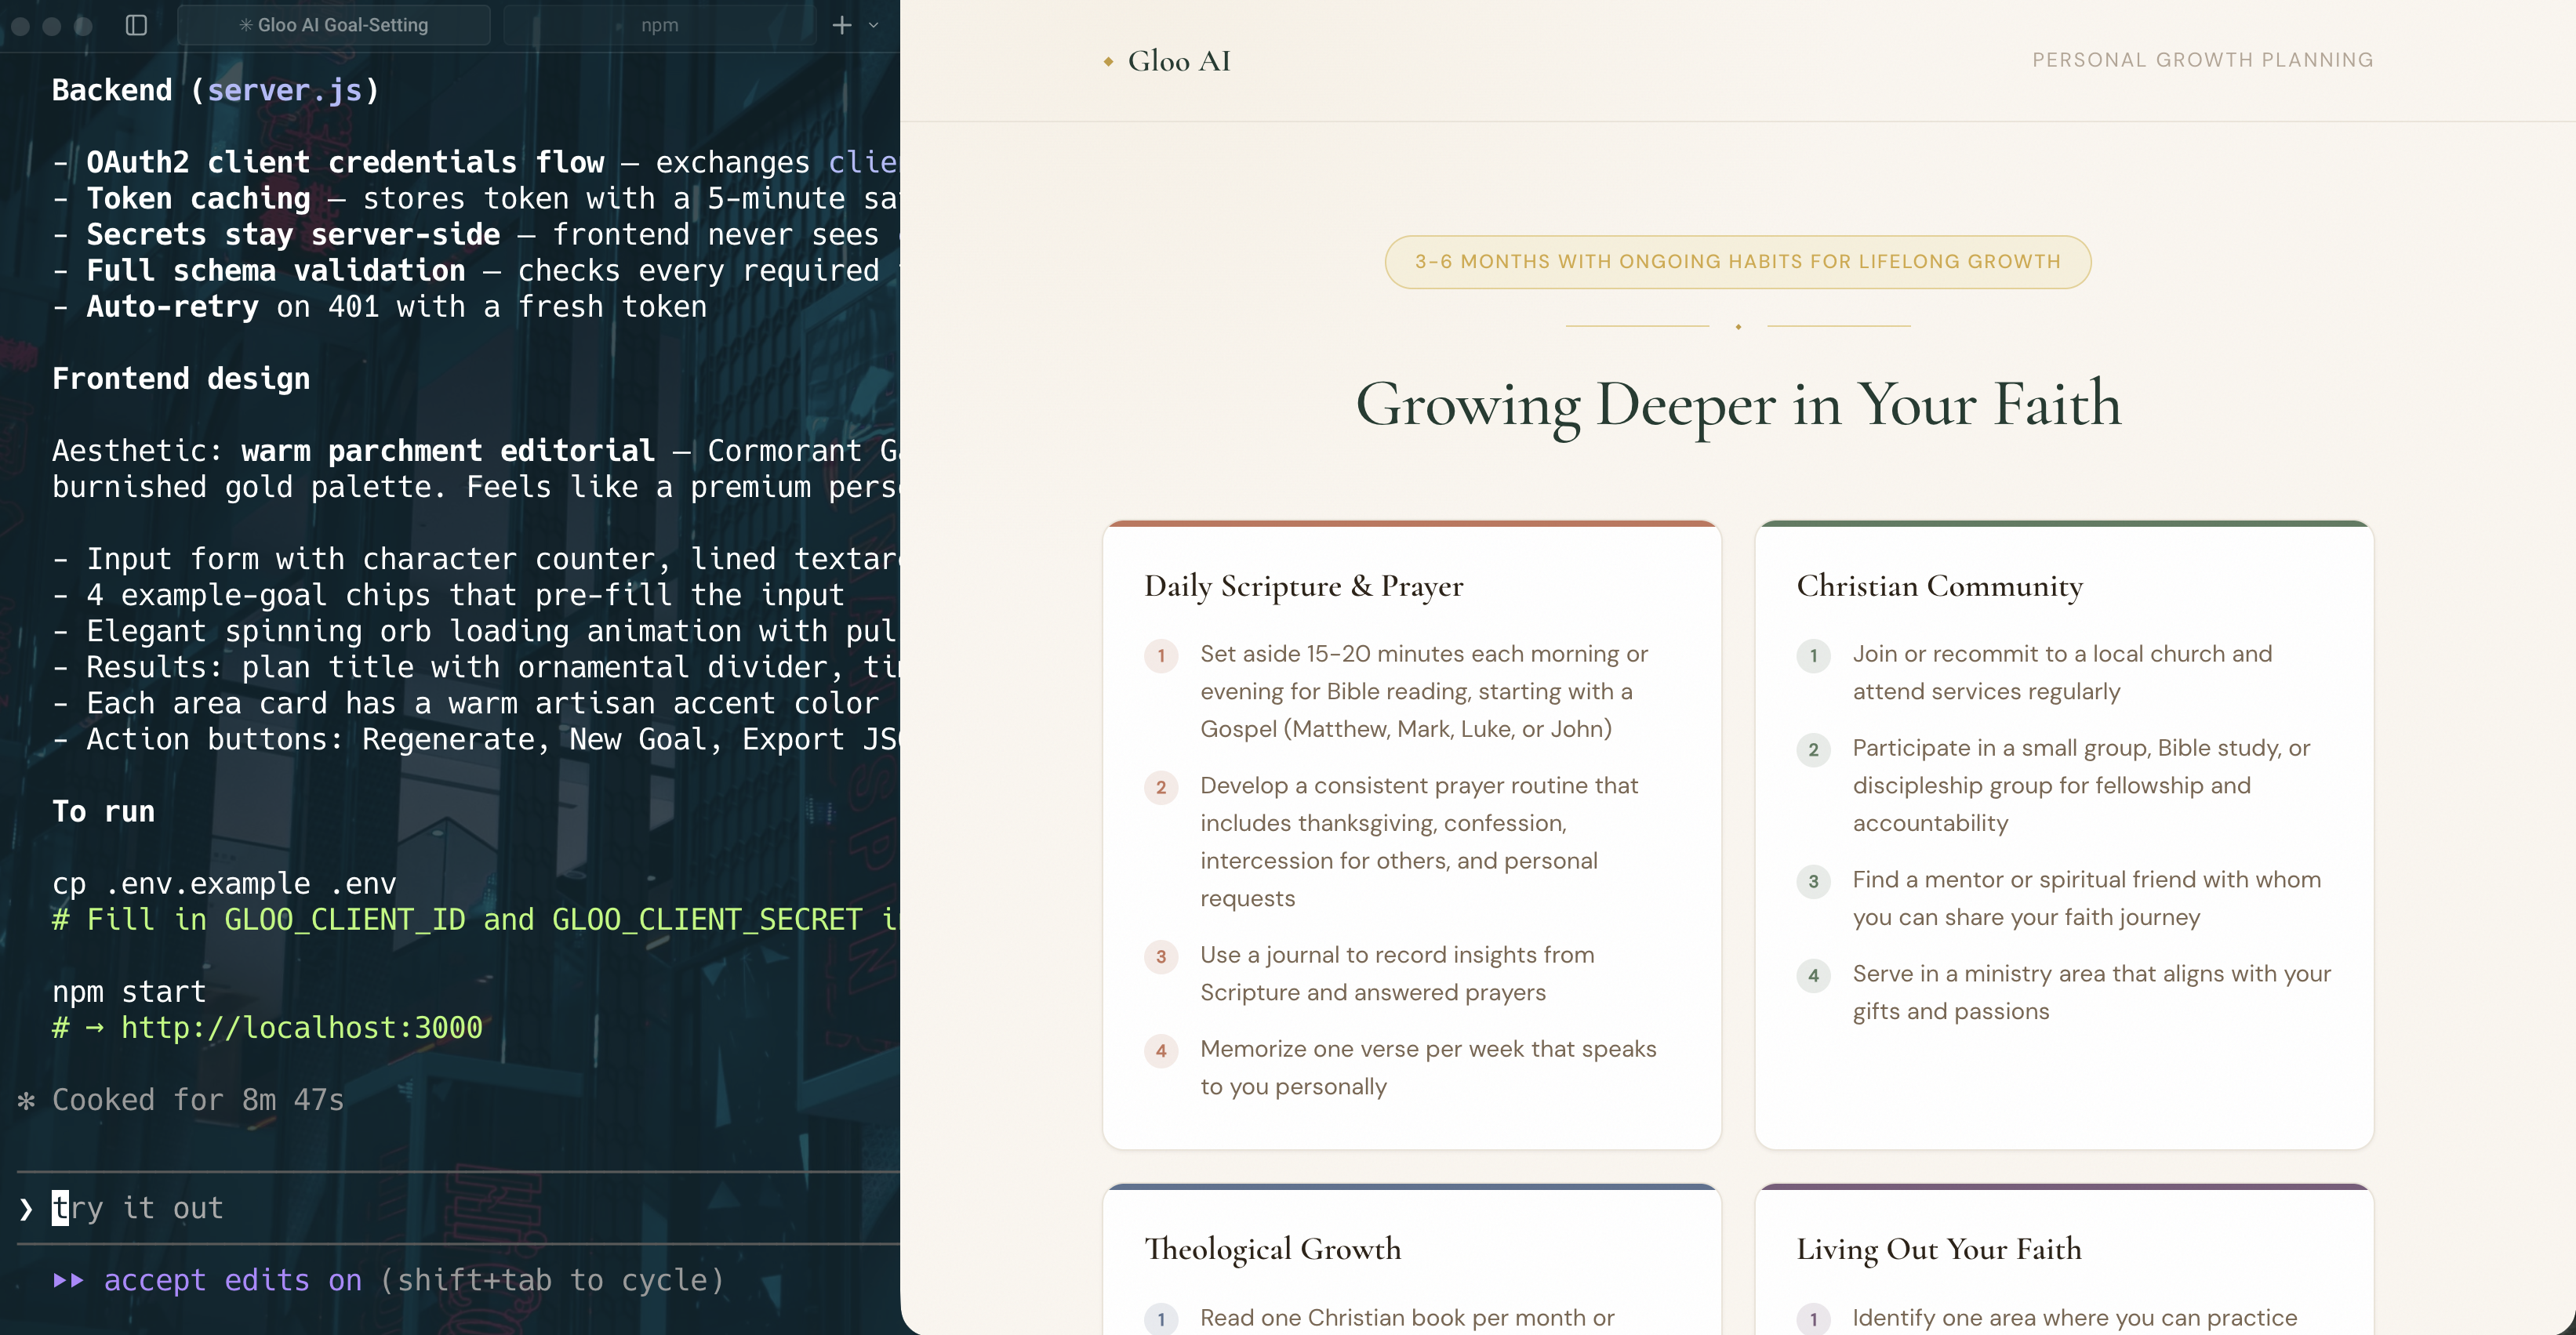
Example 2: Completions with Tool Use
Enter a test goal, for example “I want to grow in faith”. You should see something similar to the following:
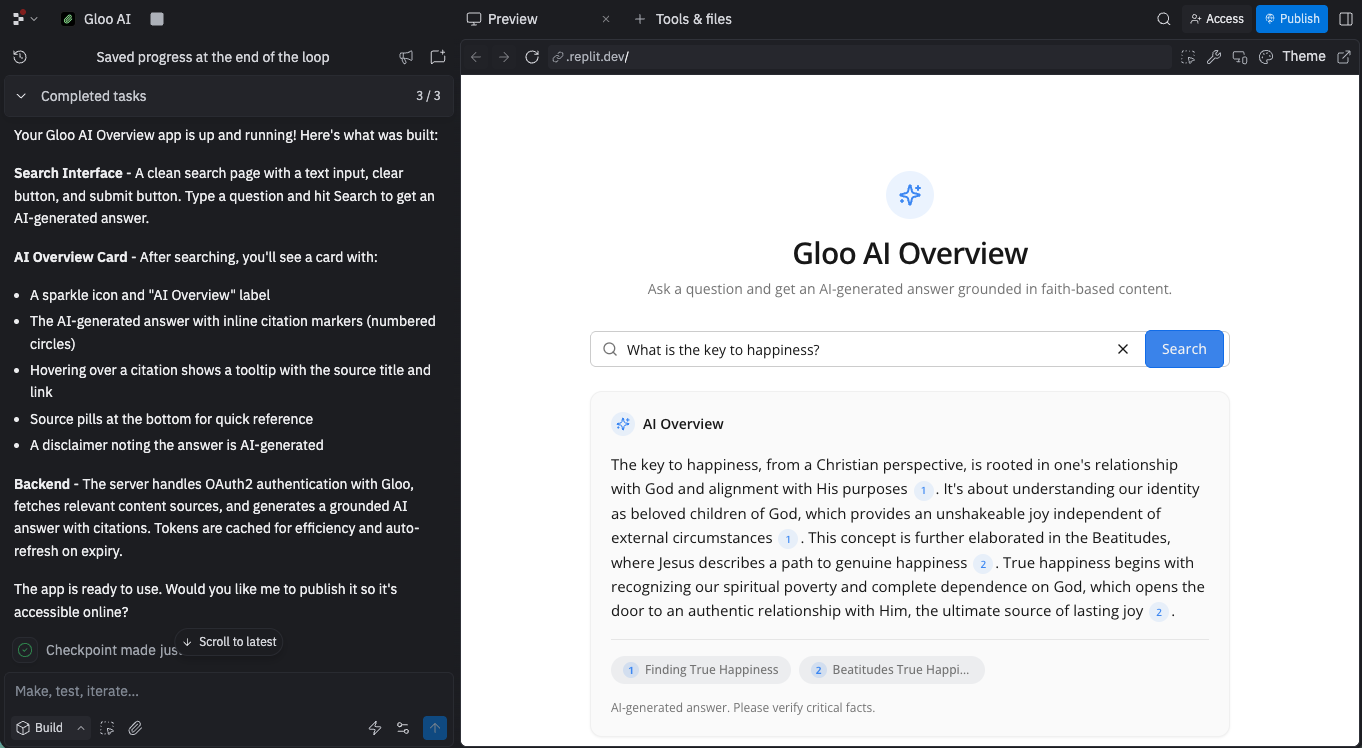
Example 3: Building AI Overviews
Enter a search query (for example, “What is my purpose in life?”). Verify that:- The UI shows a loading skeleton while waiting
- The answer includes inline citation markers rendered as link icons
- Hovering each link icon shows the source title and link
Iterate if Needed
If something isn’t right, use follow-up prompts:- “Add error handling for network timeouts”
- “Make the UI mobile-responsive”
- “Add a loading skeleton instead of a spinner”
- “Change the color scheme to match our brand”
Step 5: Understanding Advanced Patterns
As you build more complex applications, you’ll want to understand these patterns. You can ask your AI coding assistant to implement these by adding them to your prompts. You can also use them in a follow-up prompt.Pattern 1: Token Caching
Pattern 2: Comprehensive Error Handling
Pattern 3: Client-Side Rate Limiting
Platform-Specific Optimizations
Different AI coding assistants have different strengths. Here are a few pointers to get the best results from each:Base44 / Bolt.new / Lovable / Replit Agent / v0.dev
- Use assistants like ChatGPT to create a detailed project requirements document (PRD) first. Review and split into phases for implementation.
- Upload screenshots or sketches instead of describing layouts.
- Stick to the tool’s default stack to avoid friction.
- Use automatically created checkpoints to revert to a previous version if needed.
- Iterate in small steps rather than requesting complete rewrites.
Claude Code / Codex
- Go into plan mode before coding.
- Break projects into short, reviewable steps or components.
- Review results often, request refinements after each pass.
- Start fresh sessions or limit irrelevant history to reduce confusion.
- Be clear about what “done” means (ex: passing unit tests, zero lint errors, responsive design).
Antigravity
- Define a high-level goal (e.g., “Implement search bar”) instead of small tasks.
- Utilize Agent Manager for parallelizing and overseeing tasks.
- Request Artifacts like Screenshots or Browser Recordings for verification.
Troubleshooting
Here are some common issues you may run into with these examples and in general when using AI coding assistants to build with Gloo AI.-
503 errors when backend calls API:
- Verify the endpoint being used in the code.
- Provide the coding assistant with links to relevant resources, such as the API reference or related tutorial documentation.
-
500 errors calling completions with tool use:
- Verify the endpoint being used in the code.
- Verify that the model being used supports tool use.
- Try the API call directly in the playground.
What You’ve Learned
Congratulations! You now know how to effectively use AI assistants to build with Gloo AI. You learned how to structure effective prompts, properly secure your API calls, then tested these out on some example use cases.Next Steps
- Check out the API documentation for complete API reference
- Review other tutorials where you can work directly with code.
- Found a better way to structure a prompt? Share it with us.
- Generated an innovative application? We’d love to see it.
- Which prompts worked best for you?
- Which AI coding assistant you prefer?
- What examples you’d like to see added?