Overview
The Gloo AI completions API supports streaming responses, so instead of waiting for the full answer, your application receives tokens one at a time as the model generates them. This creates a faster, more interactive user experience and is the standard pattern for chat and content-generation products. In this tutorial you’ll build a streaming client from scratch: parsing the SSE wire protocol, accumulating tokens, handling errors, and rendering output as it arrives. You’ll also build a server-side proxy that shields your API credentials from the browser.What You’ll Build
By the end of this tutorial, you’ll have a complete streaming implementation featuring:- SSE stream parser that reads tokens as they arrive from the API
- Token accumulator that assembles the full response with timing and token count
- Streaming-aware error handler that catches auth and rate-limit errors before reading the stream
- Terminal renderer that displays tokens in real time with a typing effect
- Server-side proxy that relays the stream to browser clients without exposing your credentials
Understanding Server-Sent Events
When you set"stream": true in a completions request, the API switches from a single JSON response to an SSE stream. Each token arrives as a line formatted data: <json>, with blank lines separating events:
finish_reason (typically "stop").
Two Approaches: Direct vs. Proxy
This tutorial covers two ways to consume the stream:| Approach | How it works | When to use |
|---|---|---|
| Terminal | Your server calls the API directly and prints tokens | Background jobs, CLIs, server-side rendering |
| Proxy | A lightweight server relays SSE to any external client | Web apps, any case where browser JS would expose credentials |
Prerequisites
Before starting, ensure you have:- A Gloo AI Studio account with API credentials
- Your Client ID and Client Secret from the API Credentials page
- Authentication setup — complete the Authentication Tutorial first
The starter project includes a pre-built auth module. You don’t need to implement authentication in this tutorial — it’s already working in the starter code.
Getting Started with the Starter Project
This tutorial uses a hands-on approach where you’ll build the streaming client incrementally. The starter code provides complete scaffolding with TODO markers guiding each step.Download the Starter Code
Choose your preferred language and download the starter project:Python
Python 3.9+ · requests · Flask
JavaScript
Node.js 18+ · native fetch · Express
TypeScript
TypeScript 5+ · typed SSE chunks
PHP
PHP 8.1+ · cURL write callback
Go
Go 1.20+ · bufio.Scanner · http.Flusher
Java
Java 17+ · HttpClient · Maven
Quick Setup
Test Your Setup
Run the entry point — it should load your credentials and confirm the stubs are in place:NotImplementedError (or equivalent) from the first stub — confirming that setup is complete and you’re ready to implement.
Architecture Overview
Component Architecture
Implementation Roadmap
| Step | What You Build | Track | Validates |
|---|---|---|---|
| 1 | Environment setup | Shared | Auth loads; streaming endpoint reachable |
| 2 | Handle stream errors | Shared | 401/403/429 errors thrown before stream read |
| 3 | Streaming request + SSE parsing | Shared | HTTP connection opens; SSE lines parsed; [DONE] detected |
| 4 | Token extraction + accumulation | Shared | Token text extracted; full response assembled with timing |
| 5 | Render stream to terminal | Terminal | Tokens print live to terminal |
| 6 | Proxy stream handler | Proxy | SSE relayed through server |
| 7 † | Testing & browser demo | Proxy | End-to-end validation |
† No new implementation — run the demo, test the proxy via API, and explore the browser client.
Step 1: Environment Setup & Auth Verification
The starter project includes a pre-built auth module that handles OAuth2 client credentials. Before implementing any streaming logic, confirm it works with the streaming endpoint.What You’ll Verify
- Credentials load correctly from
.env - A token can be obtained from the Gloo AI auth server
- A request to the completions endpoint returns
200 OKwithContent-Type: text/event-stream
Testing Your Setup
Run the Step 1 checkpoint now — it should pass with the pre-built auth:✓ Checkpoint: Auth Verification
Your output should look similar to the following:.envfile exists in the language directory (not just.env.example)GLOO_CLIENT_IDandGLOO_CLIENT_SECRETare set correctly- You’ve completed the Authentication Tutorial prerequisites
Step 2: Streaming-Aware Error Handling
Now implement the stream error handler, a focused function that maps HTTP status codes to descriptive exceptions before any stream data is read.Key Concepts
Two-Phase Error Handling
Streaming introduces two distinct error phases: Phase 1 — Pre-stream (before reading bytes): The HTTP status tells you everything. A 401 means bad token; a 429 means slow down. Check the status immediately and throw a specific error before touching the body. This is what the stream error handler does. Phase 2 — Mid-stream (while reading bytes): The connection is live when something fails — network drop, server restart, timeout. Catch these in the accumulation loop with a try/catch around the read loop. If you’ve already accumulated partial text, preserve it and return what you have rather than discarding the work. Separating these phases makes errors debuggable: pre-stream errors have status codes; mid-stream errors have partial content.Implementation Guide
Open your streaming client file and find the error handler method, it’s a small, focused function with one case per status code. Review the TODO comments, then implement the function:- Throws an authentication error on 401 if the token is missing, expired, or malformed
- Throws an authorization error on 403 if the token is valid but lacks permission for this resource
- Throws a rate limit error on 429 if the request was rejected before the API spent any compute
- Throws a generic error for any other non-200 status, including the response body for diagnostic context
- Returns without throwing on 200 so the caller can proceed to read the stream
✓ Checkpoint: Error Handling
Run the error handling test:- Status 200 must not raise an exception
- The error message for non-200 includes the status code
- The response body is truncated (first 200 chars) to avoid enormous error messages
Step 3: Streaming Requests & SSE Parsing
Time to wire up the streaming connection. You’ll open a persistent HTTP connection to the completions API and write the parser that converts raw SSE lines into something you can actually work with.What You’ll Implement
- A function to initiate a streaming request
- A function to parse individual SSE lines
Making the Streaming Request
Why stream: true Changes Everything
Without stream: true, the API buffers the entire response and returns it as a single JSON object. With stream: true, it switches to SSE mode: the connection stays open and bytes arrive incrementally as the model generates them.
This is why you return the raw response object rather than parsed JSON — the body isn’t fully available yet. The caller will read it line by line in the next steps.
Fail Fast Before Reading
Checking the HTTP status code before starting to read the stream is important for a clean user experience. A 401 response will never produce SSE data — it returns a JSON error body. If you skipped the status check and tried to parse lines from a 401 response, you’d get confusing parse errors instead of a clear “authentication failed” message.Implementation Guide
Still in the same streaming client file, find the streaming request method, review the TODO comments, then implement the changes outlined in the code block:- Sets
AuthorizationandContent-Typeheaders using the provided token - Builds the request payload with
stream: trueto enable SSE mode andauto_routing: trueto let Gloo select the best model - Checks the HTTP status before reading any response data, raising a descriptive error for non-200 responses
- Returns the raw response object so the caller can iterate its body line by line
PHP note: cURL’s streaming architecture doesn’t allow inspecting the HTTP status before the write callback fires. The status check happens on the first data chunk instead. This is the idiomatic PHP pattern for streaming with cURL.
Parsing SSE Lines
The SSE Wire Format
SSE is a simple text protocol. Each event is one line starting withdata: , terminated by a blank line. In practice, the Gloo AI stream looks like:
data: (such as event: or : comment lines) should also be skipped.
Defensive Parsing
The JSON parse is wrapped in a try/catch. Mid-stream network hiccups can produce partial lines — you don’t want a single malformed chunk to crash the entire stream. Returnnull for unparseable lines and let the accumulation loop move on.
Implementation Guide
You’re still working with the streaming client file. Find the SSE line parser method, review the TODO comments, then implement:- Returns
nullfor blank lines and lines that don’t start withdata:, signalling the caller to skip to the next line - Strips the
data:prefix to isolate the raw JSON payload - Detects the
[DONE]sentinel before attempting JSON parsing and returns it as a string to signal the end of the stream - Parses the payload as JSON and returns the result, or
nullif parsing fails — never throws on malformed input
✓ Checkpoint: Streaming Request & SSE Parsing
Run the validation test for this step:- The streaming request function sets
streamtotruein the payload - The SSE line parser strips exactly 6 characters (
"data: "has a space after the colon) - The
[DONE]check happens before the JSON parse
Step 4: Token Extraction & Accumulation
Next you’ll add the pieces to pull the token out of each parsed SSE chunk, and the accumulation loop that stitches everything together into a complete result.What You’ll Implement
- A function to extract token content from a parsed SSE chunk
- A function to collect the full stream into a result object
Extracting Token Content
Why Content Can Be Absent
Not every SSE chunk carries text. The first chunk establishes the role (delta: {"role": "assistant"}), while the final chunk carries the finish reason with an empty or absent delta. Only chunks in the middle carry actual content.
This is why you return an empty string rather than throwing since an absent content field is completely normal. The accumulation loop skips empty strings when counting tokens.
Null-Safe Navigation
Different languages handle missing keys differently. In Python,.get() returns None without raising; in JavaScript/TypeScript, optional chaining (?.) does the same. In Go and Java the struct is fully typed, so missing content simply maps to the zero value. The goal in all languages is the same: never throw when a field is absent.
Implementation Guide
Still in the streaming client file, find the token content extractor, review the TODO comments, then implement:- Returns an empty string immediately if
choicesis absent or empty — the first and last chunks often carry no content - Reads
delta.contentfrom the first choice, returning an empty string if the field is absent ornull - Handles any unexpected chunk structure by returning an empty string rather than throwing, keeping the accumulation loop running cleanly
Accumulating the Full Response
Two Ways to Consume a Stream
You can either accumulate all tokens into a string (what the function in this step does) or print each token immediately as it arrives (what the function in Step 5 does). The choice depends on whether you need the full text before taking action:- Accumulate: useful when you need to parse the full response, log it, or return it from an API
- Print immediately: useful for CLI tools and browser UIs where you want the typing effect
The Line Buffer (JS/TS/PHP)
In Python and Go, the HTTP libraries provide line-at-a-time iteration. In JavaScript, TypeScript, and PHP, you read raw bytes and split on\n yourself. This requires a line buffer: keep any incomplete final chunk in a variable and prepend it to the next read’s output. Without it, tokens near chunk boundaries get split across two parse calls.
Implementation Guide
Open the streaming client file and find the accumulation loop method. This one brings together everything from the previous steps, with the TODO comments showing each stage. Take a moment to trace through the structure before implementing.- Records the start time before opening the stream so elapsed duration includes connection overhead
- Initializes accumulators for the full text, token count, and finish reason
- Iterates the stream line by line, parsing each with the SSE parser and skipping
nulllines - Stops the loop when a non-null
finish_reasonis detected or a[DONE]sentinel arrives - Returns a single result object containing the assembled text, token count, elapsed duration in milliseconds, and finish reason
✓ Checkpoint: Token Extraction & Accumulation
Run the validation test for this step:- The token content extractor returns
""(notNone/null) when content is absent - The accumulation loop reads
finish_reasonfromchoices[0], not from the top-level chunk - The line buffer (
buffer = lines.pop()) is in place for JS/TS/PHP
Step 5: Typing-Effect Terminal Renderer
Now implement the terminal renderer, a function that prints each token immediately to stdout without a newline, creating a live typing effect in the terminal. This step demonstrates an important pattern: consuming the stream directly rather than accumulating it first. The renderer calls the streaming request, SSE parsing, and token extraction functions, but skips the accumulation loop entirely.Key Concepts
Unbuffered Output
By default, most languages buffer stdout which means that output is held until the buffer fills or the program exits. For a typing effect you need every token to appear immediately. Each language has its own way to force this:| Language | Unbuffered write |
|---|---|
| Python | print(content, end="", flush=True) |
| JavaScript / TypeScript | process.stdout.write(content) |
| PHP | echo $content; ob_flush(); flush(); |
| Go | fmt.Fprint(os.Stdout, content) (stdout is unbuffered by default) |
| Java | System.out.print(content); System.out.flush(); |
Direct Stream Consumption vs. Accumulation
The stream completion function from Step 4 accumulates everything and returns once the stream is complete. The terminal renderer function prints as it goes, the user sees output before the model has finished generating. Both patterns are valid; the right choice depends on whether the output needs to be complete before it’s useful.Implementation Guide
Open the renderer file referenced in the code block. Unlike the streaming client, this file has a single method to implement. Review the TODO comments, then implement:- Prints the user’s message as a prompt header before the response begins
- Opens the stream and iterates SSE lines directly, without an accumulation loop, so tokens are available to print as soon as they arrive
- Writes each token to stdout without a trailing newline and flushes immediately, producing a character-by-character typing effect
- Prints a summary line with the total token count and finish reason after the stream ends
✓ Checkpoint: Terminal Renderer
Run the validation test:With a short prompt like this, tokens arrive so quickly that the typing effect may not be visible — the response appears all at once. That’s expected. In production, longer AI responses make the effect clear: each token renders as it arrives rather than waiting for the full response. This is the pattern your chat UI will use.
- Each token is written with no trailing newline
flush()or equivalent is called after each write- The summary line format is
[N tokens, finish_reason=X]
Step 6: Server-Side Proxy
In this step you’ll implement the proxy server’s stream handler. This is the route that receives requests from browser clients, forwards them upstream to Gloo AI with a server-side auth token, and pipes the SSE response back.Key Concepts
Why a Proxy?
Browser JavaScript cannot safely include API credentials because anything in client code is visible to anyone who opens DevTools. A proxy server is the standard solution: the browser POSTs to your server, your server adds the auth token and POSTs to Gloo AI, and the SSE stream flows back through your server to the browser. An additional benefit: the proxy can add rate limiting, logging, and multi-tenant auth logic without touching client code.SSE Headers That Matter
Three headers tell the browser (and any reverse proxies like nginx) that this is a live stream, not a buffered response:| Header | Value | Why |
|---|---|---|
Content-Type | text/event-stream | Identifies the SSE protocol |
Cache-Control | no-cache | Prevents browser caching of the stream |
X-Accel-Buffering | no | Disables nginx buffering so bytes arrive immediately |
Language-Specific Flushing
Each language needs an explicit flush mechanism to push bytes to the client immediately:| Language | Flush mechanism |
|---|---|
| Python (Flask) | yield from a generator — Flask flushes on each yield |
| JavaScript/TypeScript | res.write() — Express sends immediately |
| PHP | flush() after each write |
| Go | flusher.Flush() — requires http.Flusher interface |
| Java | out.flush() after each write |
Implementation Guide
Open the proxy server file referenced in the code block. The server setup and routing are already in place. Find the stream handler method (or route handler, depending on the language), review the TODO comments, and implement the relay logic:- Sets
Content-Type: text/event-stream,Cache-Control: no-cache, andX-Accel-Buffering: nobefore writing any response data - Handles
OPTIONSpreflight requests immediately so browsers can POST cross-origin - Retrieves a fresh auth token using the pre-built token manager, keeping credentials server-side
- Reads the incoming request body, injects
stream: true, and forwards the request to the Gloo AI API - Relays each non-blank SSE line to the client and flushes immediately so tokens reach the browser as they arrive
- Writes a structured error SSE frame if the upstream request fails, avoiding a silent stream close
PHP, Go, and Java use a generic HTTP handler that receives all request methods, so they include an explicit 405 check before the streaming logic. Python, JavaScript, and TypeScript register the route for POST only, so the framework rejects other methods automatically.
✓ Checkpoint: Proxy Server
Run the proxy server validation test:- CORS headers are set before sending the response headers (Java)
X-Accel-Buffering: nois present (required to disable nginx buffering)- Go: the flusher interface assertion must succeed — this panics if the
ResponseWriterdoesn’t support flushing - PHP: clear any existing output buffers before setting SSE headers
Step 7: Testing Your Complete Implementation
With all six steps implemented, you can now run the full demo, test the proxy server via API, and explore the browser demo.Run the Demo Script
The entry point runs both examples back-to-back: first it accumulates a full response and prints it, then it streams a second response to the terminal with a typing effect.Test the Proxy Server via API
Start the proxy server in one terminal:finish_reason.
Browser Demo
The browser demo is a standalone HTML file separate from the language starter projects — no install step required.frontend-example/
Download or clone this directory alongside your language starter
frontend-example/ directory using whichever tool you have available:
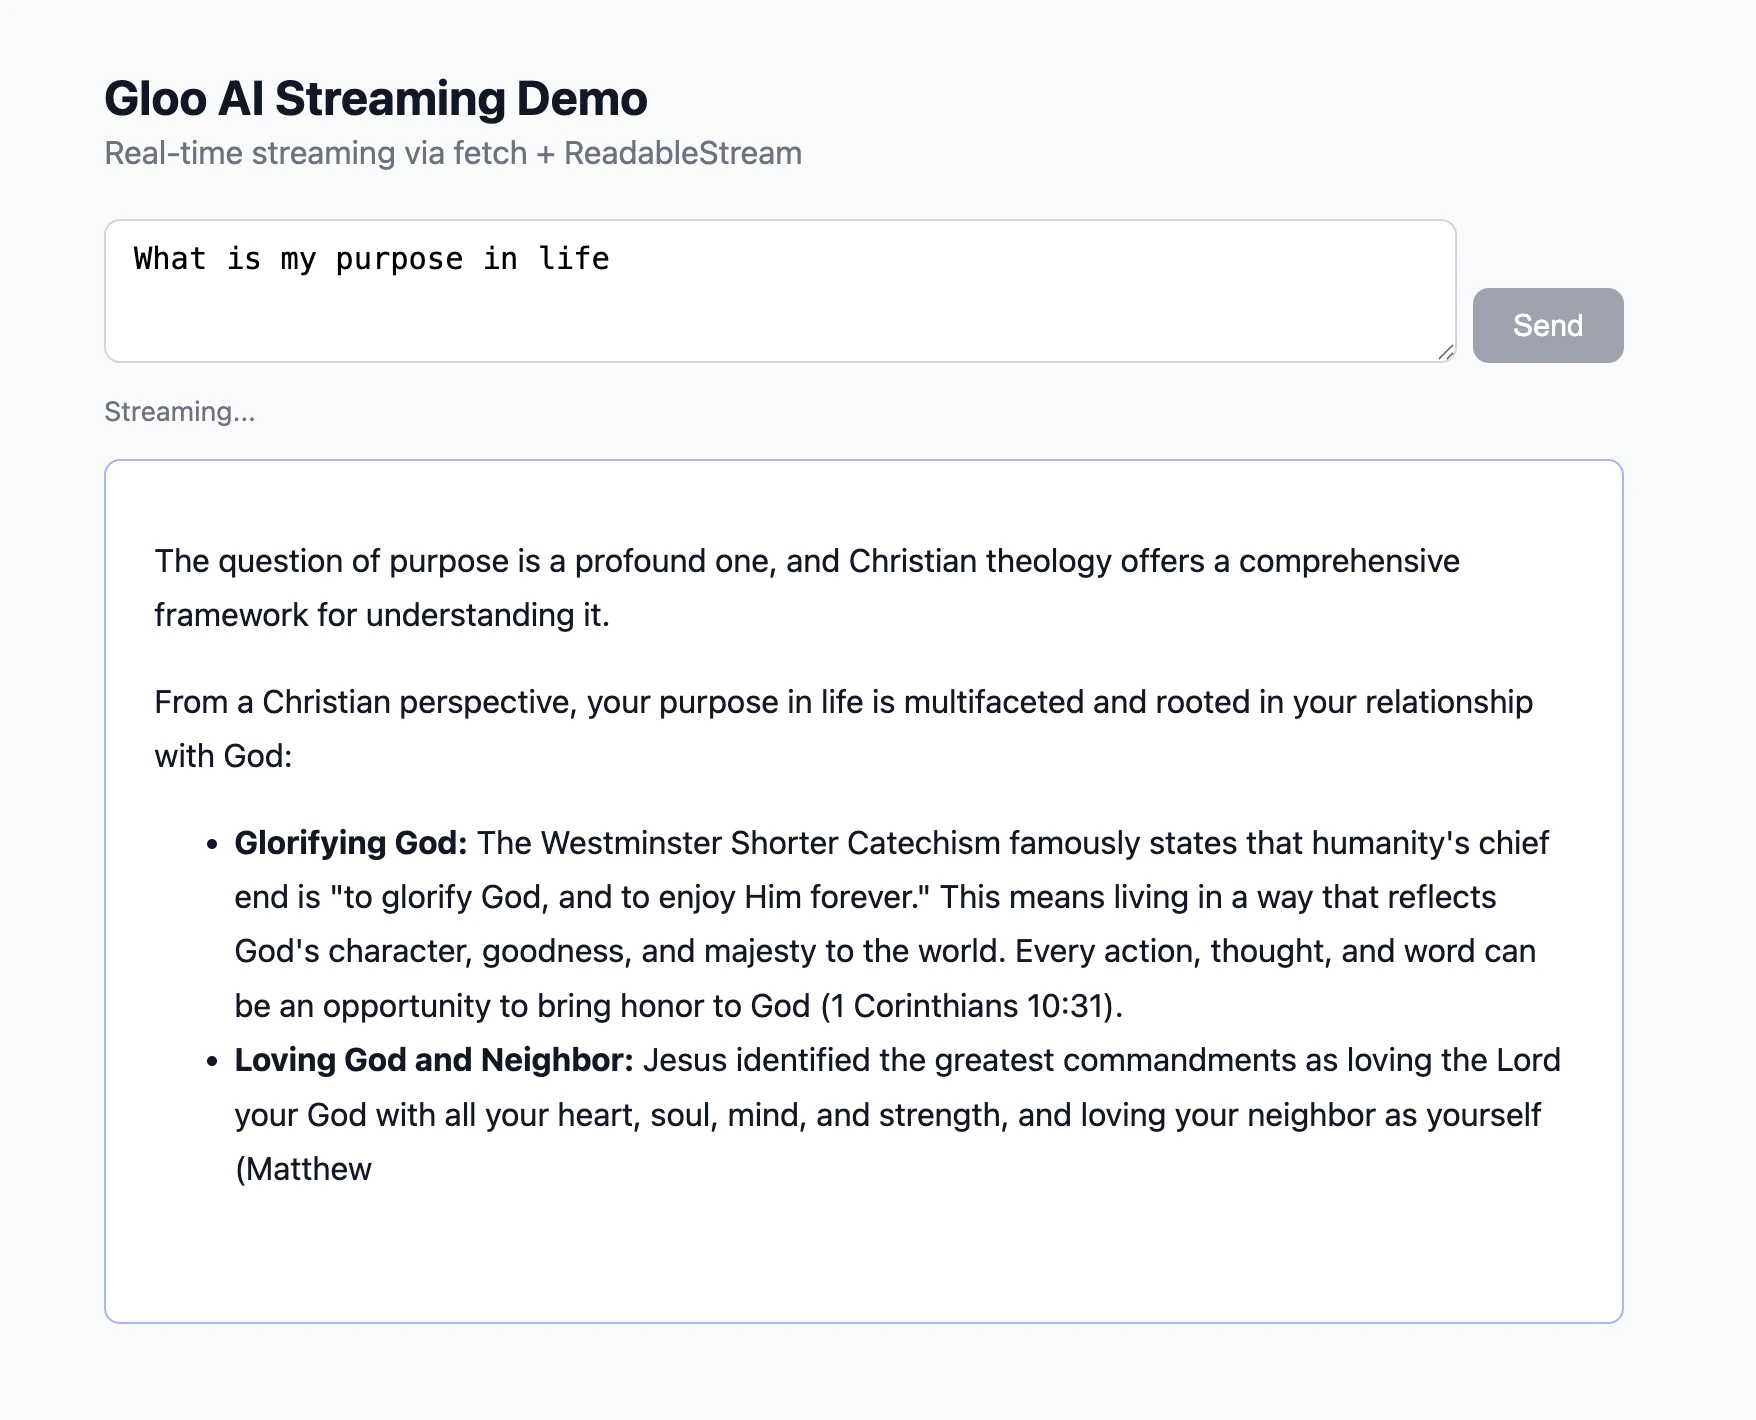
http://localhost:3000 in your browser, type a question, and click Send — tokens appear one by one as they arrive from the proxy.
How the Browser Connects to the Stream
Browsers have a built-in API calledEventSource designed for receiving server-sent events — but it only supports GET requests. Since the completions API requires a POST body containing the message text, EventSource can’t be used here. Instead, the demo page uses fetch() with a ReadableStream, which supports any HTTP method:
ReadableStream API works identically to what you used in the terminal renderer — the same line buffer, SSE parser, and token extractor pattern applies.
Markdown Rendering
AI responses often contain markdown. Inserting raw tokens directly into the DOM produces broken mid-stream output —**bo appears before ld** closes the bold span. The correct pattern is to accumulate tokens and re-parse the full buffer on each token:
marked.parse() runs on every token — slightly redundant but always produces valid HTML. DOMPurify.sanitize() prevents XSS from any HTML in the AI response.
Troubleshooting
Stream hangs and never produces output : Verify"stream": true is in the request payload. Without it, the API returns a single buffered JSON response so the connection may appear to hang while waiting for a response format that never arrives.
Garbled or split tokens
: The line buffer is missing or incorrect. In JS/TS/PHP, raw bytes must be accumulated and split on \n before parsing. Make sure buffer = lines.pop() saves the incomplete last fragment.
Authentication failed (401)
: Your .env file is missing GLOO_CLIENT_ID or GLOO_CLIENT_SECRET, or the values are incorrect. Run the Step 1 checkpoint to verify credentials load correctly.
Browser blocks direct API calls (CORS error)
: Browsers enforce same-origin policy. Direct calls from browser JavaScript to platform.ai.gloo.com will be blocked. Use the proxy server (Step 6) so API calls happen server-side.
Failed to fetch when serving the browser demo on a port other than 3000
: The proxy allows requests only from http://localhost:3000 by default. If your file server uses a different port (e.g. VS Code / Cursor Live Server on port 5500, or python -m http.server 8080), the browser’s Origin header won’t match and the proxy blocks the request. Fix: set PROXY_CORS_ORIGIN in your .env to the exact origin shown in your browser’s address bar, then restart the proxy.
http://localhost:5500 and http://127.0.0.1:5500 are treated as different origins by the browser even though they resolve to the same address. Copy the origin directly from the address bar to avoid a mismatch.
PHP output appears all at once
: PHP’s output buffering is active. Call ob_end_flush() (or while (ob_get_level() > 0) ob_end_flush()) before the SSE loop to disable buffering.
Go panics on w.(http.Flusher)
: Your http.ResponseWriter doesn’t implement http.Flusher. This shouldn’t happen with the standard net/http server, but will happen with some test wrappers. Make sure you’re using http.ResponseWriter directly.
Mid-stream disconnect loses all output
: Wrap the read loop in try/catch (or check errors in Go). If fullText already has content when the error occurs, return it rather than re-raising — partial responses are usually more useful than nothing.
Broken markdown mid-stream
: Do not insert raw tokens into innerHTML. Accumulate the full buffer and call marked.parse(buffer) on every token — this ensures the markdown is always valid HTML at each step.
View the Completed Project
If you want to see a working reference before or after completing the steps, the final project is available in the tutorial repository:Completed Project
Browse the complete implementation in all six languages — Python, JavaScript, TypeScript, PHP, Go, and Java.
Next Steps
- Grounded Completions — add retrieved context from your content library to improve response accuracy
- Tool Use — combine streaming with function calling for real-time tool-augmented responses
- Completions API reference — explore all available parameters including
tradition,model_family, andmodel